Configure SIP Trunk
In this guide, you will learn how to configure a SIP trunk. SIP trunks enable you to send and receive calls via SIP. You will want to configure a SIP trunk if you have a current external application, office PBX, or wholesale carrier connection. When calls are made to the endpoint, the system will send them to the public IP address assigned to the endpoint.
This guide goes over creating an endpoint, configuring a trunk group, and assigning a phone number. It also goes over configuring the endpoint for placing and receiving calls.
SIP trunks can be configured through the portal and programmatically.
I. Create Using Portal
In this section, we will configure an endpoint through the portal, and then assign a trunk group. A trunk group routes phone numbers to an endpoint.
To set up a SIP trunk, log into your CarrierX account. On the left-side menu, locate and click the Configure menu. Click Endpoints.
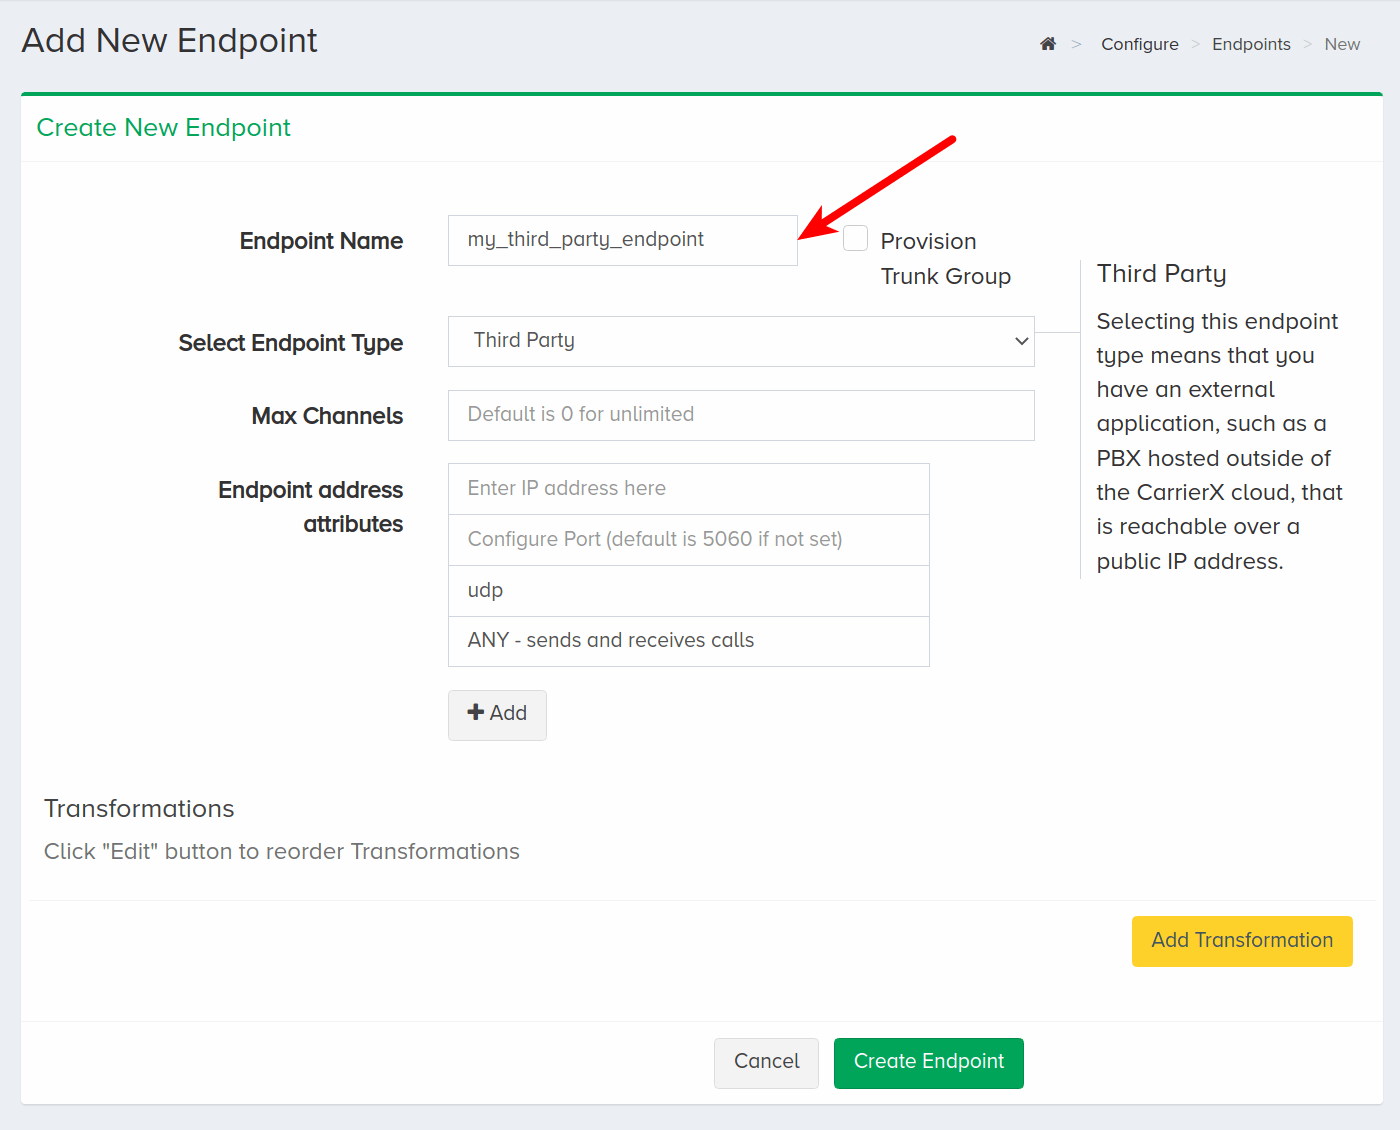
Click Add New Endpoint.

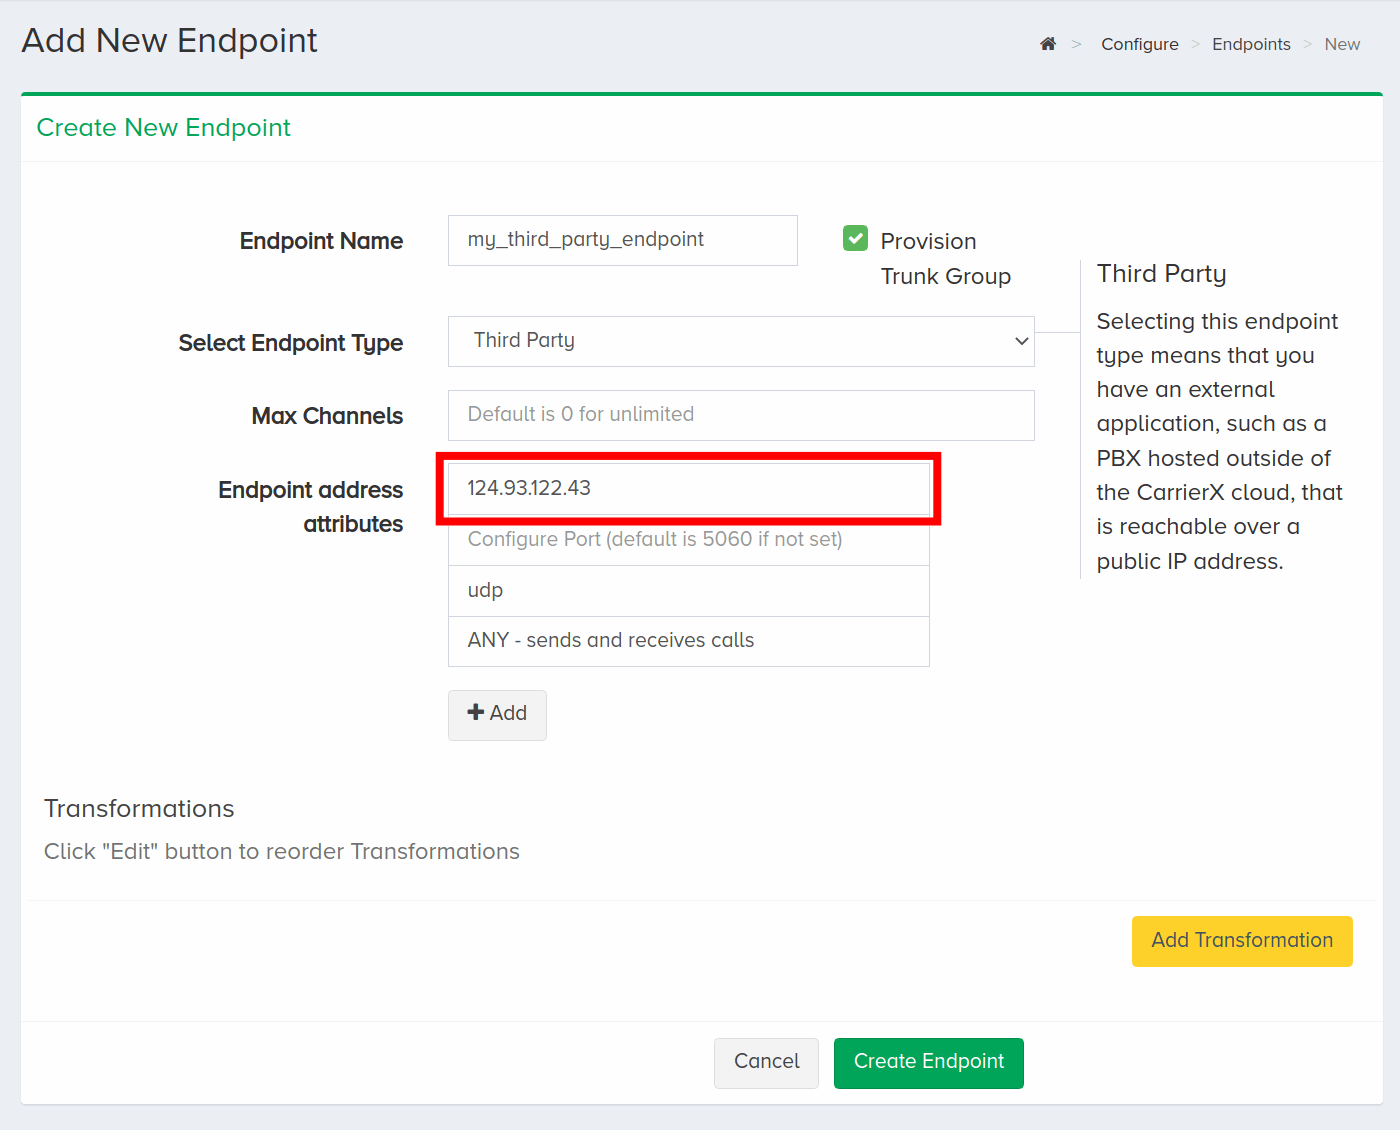
Enter a name for the new endpoint. This is a friendly name that is used for internal reference.
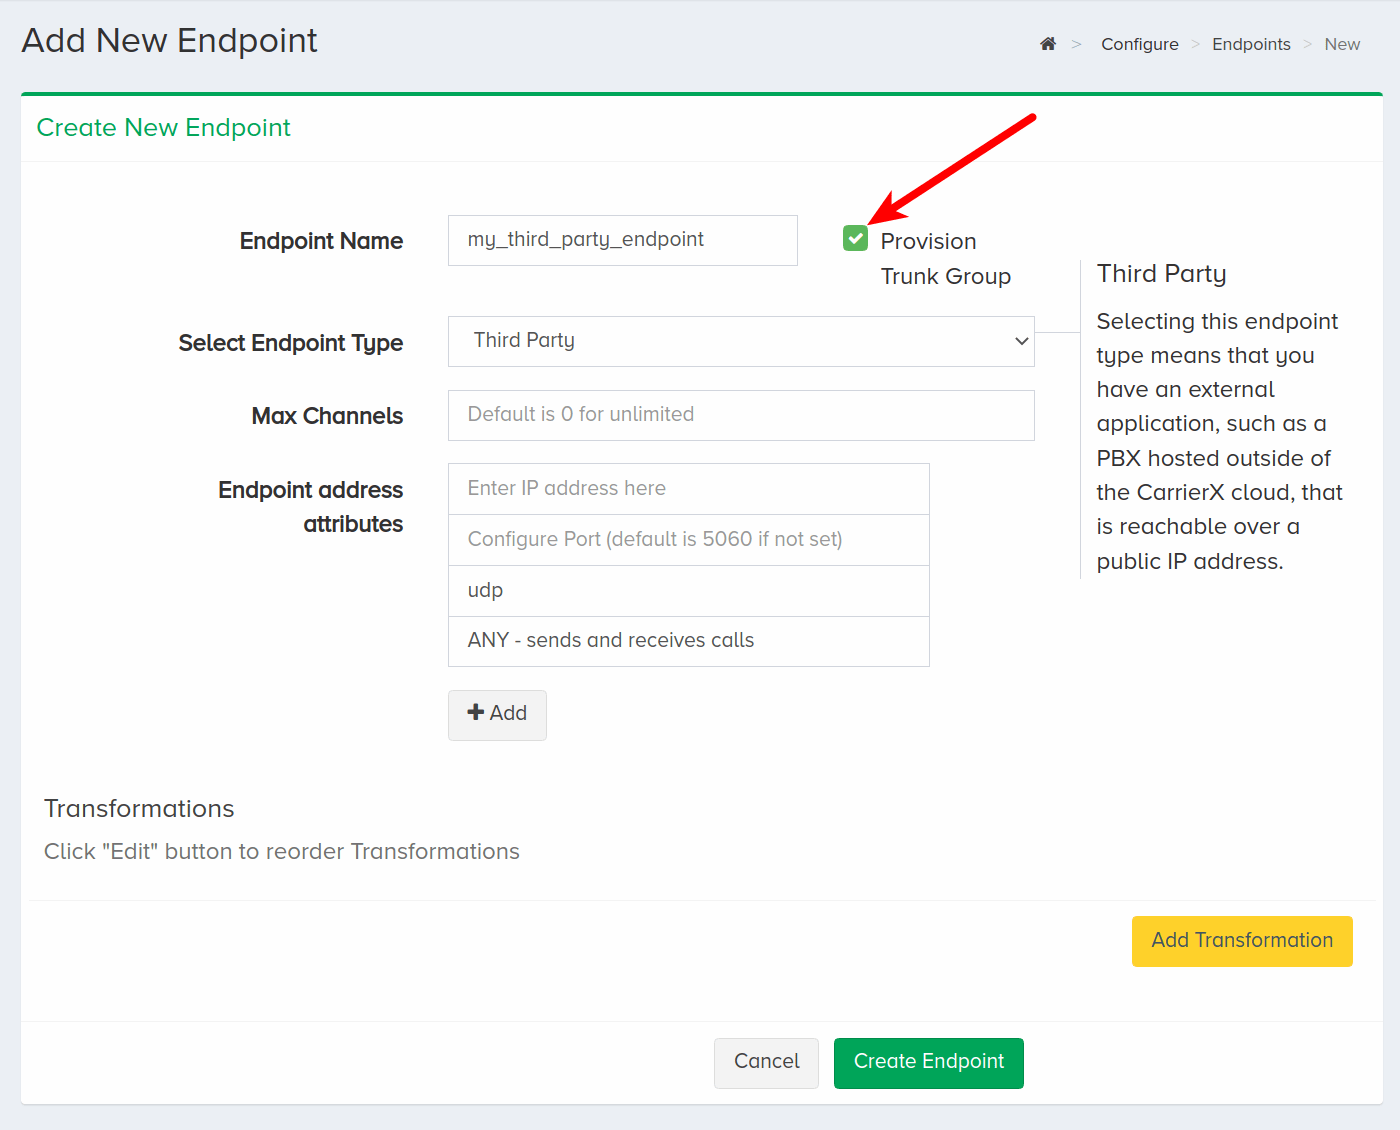
Check Provision Trunk Group to create a trunk group alongside the endpoint. A trunk group determines where a call should be routed. Trunks route calls to the appropriate endpoint by identifying the phone number dialed and matching it to the trunk group that the phone number is assigned to.
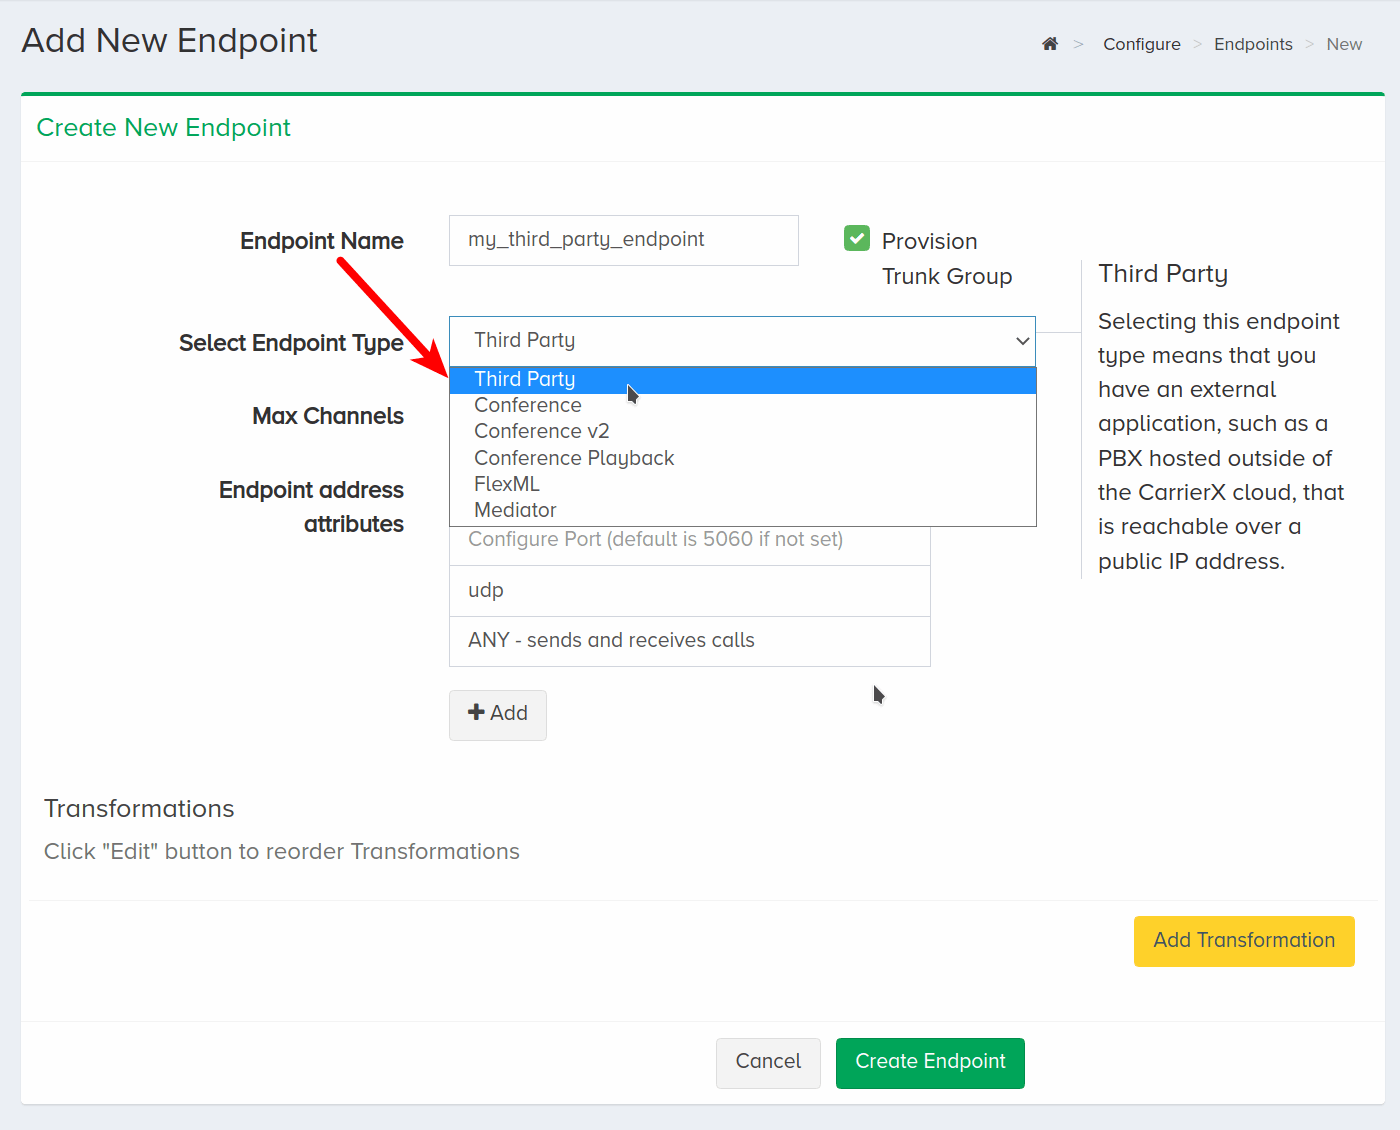
Select Third Party from the Select Endpoint Type dropdown menu.
Enter the public IP address of your SIP device. You can also add a port, otherwise it will default to 5060.
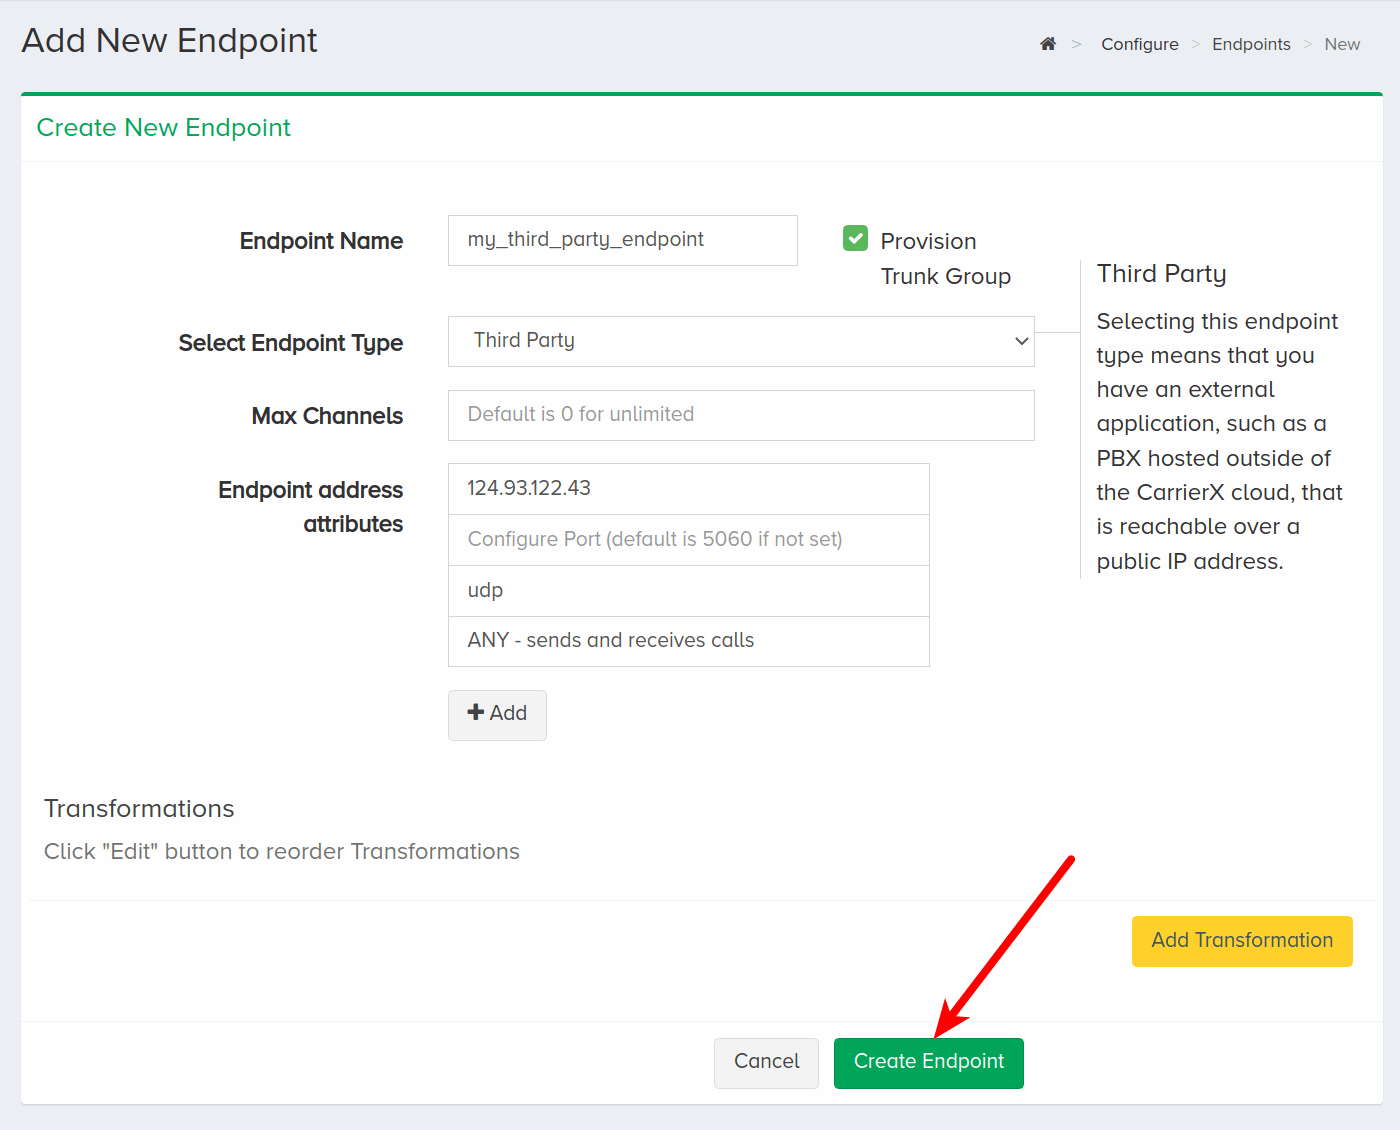
Click Create Endpoint.
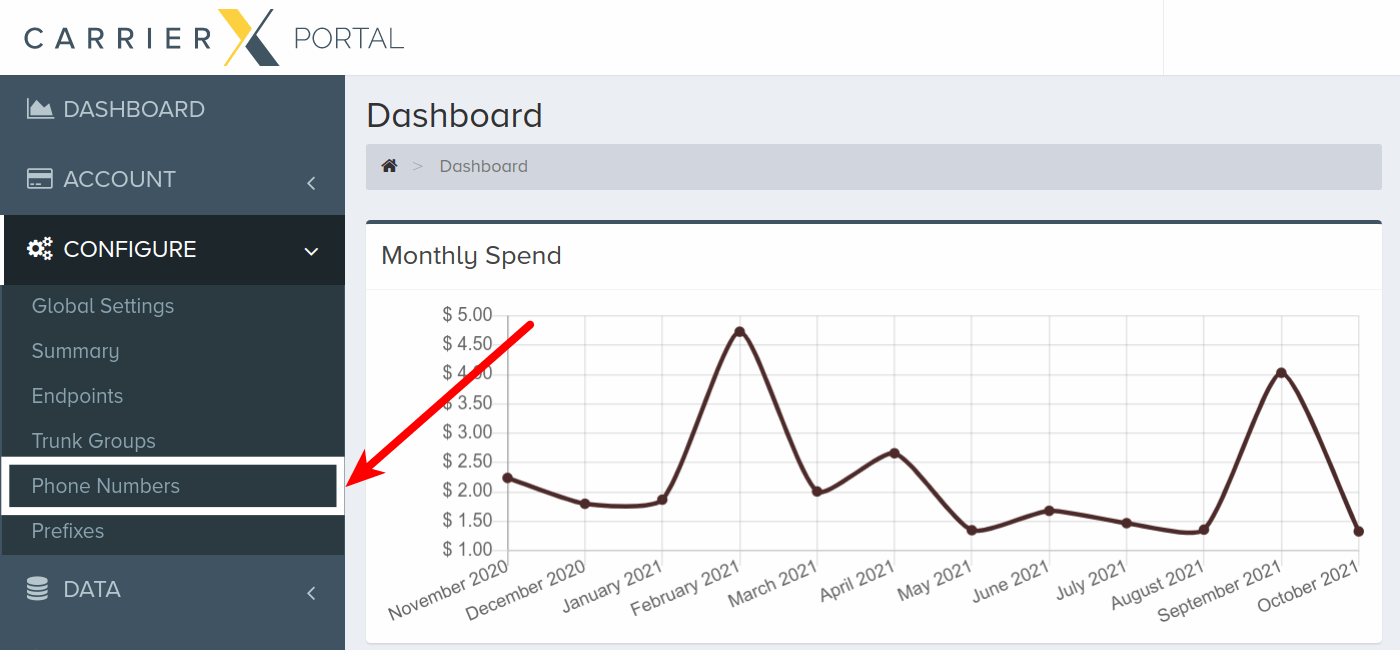
Now that the SIP trunk has been configured, we can assign a phone number to this endpoint.
Navigate to the Configure menu and click Phone Numbers.
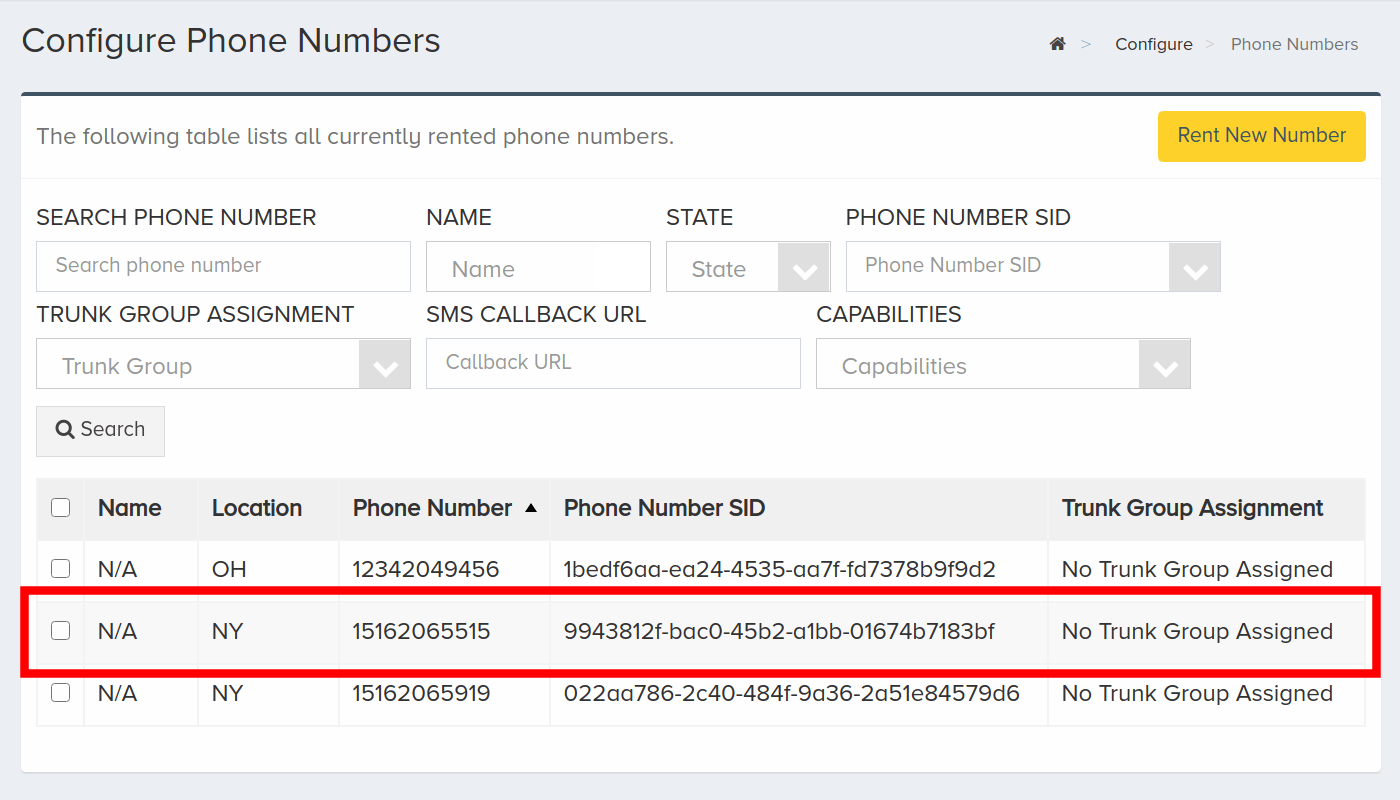
Click a phone number that you would like to associate with the endpoint trunk group. Alternatively, you can rent a new phone number. In this case, we will use a phone number that we have already rented.
Once you have selected a phone number, scroll down to see the phone number details. Click Edit.
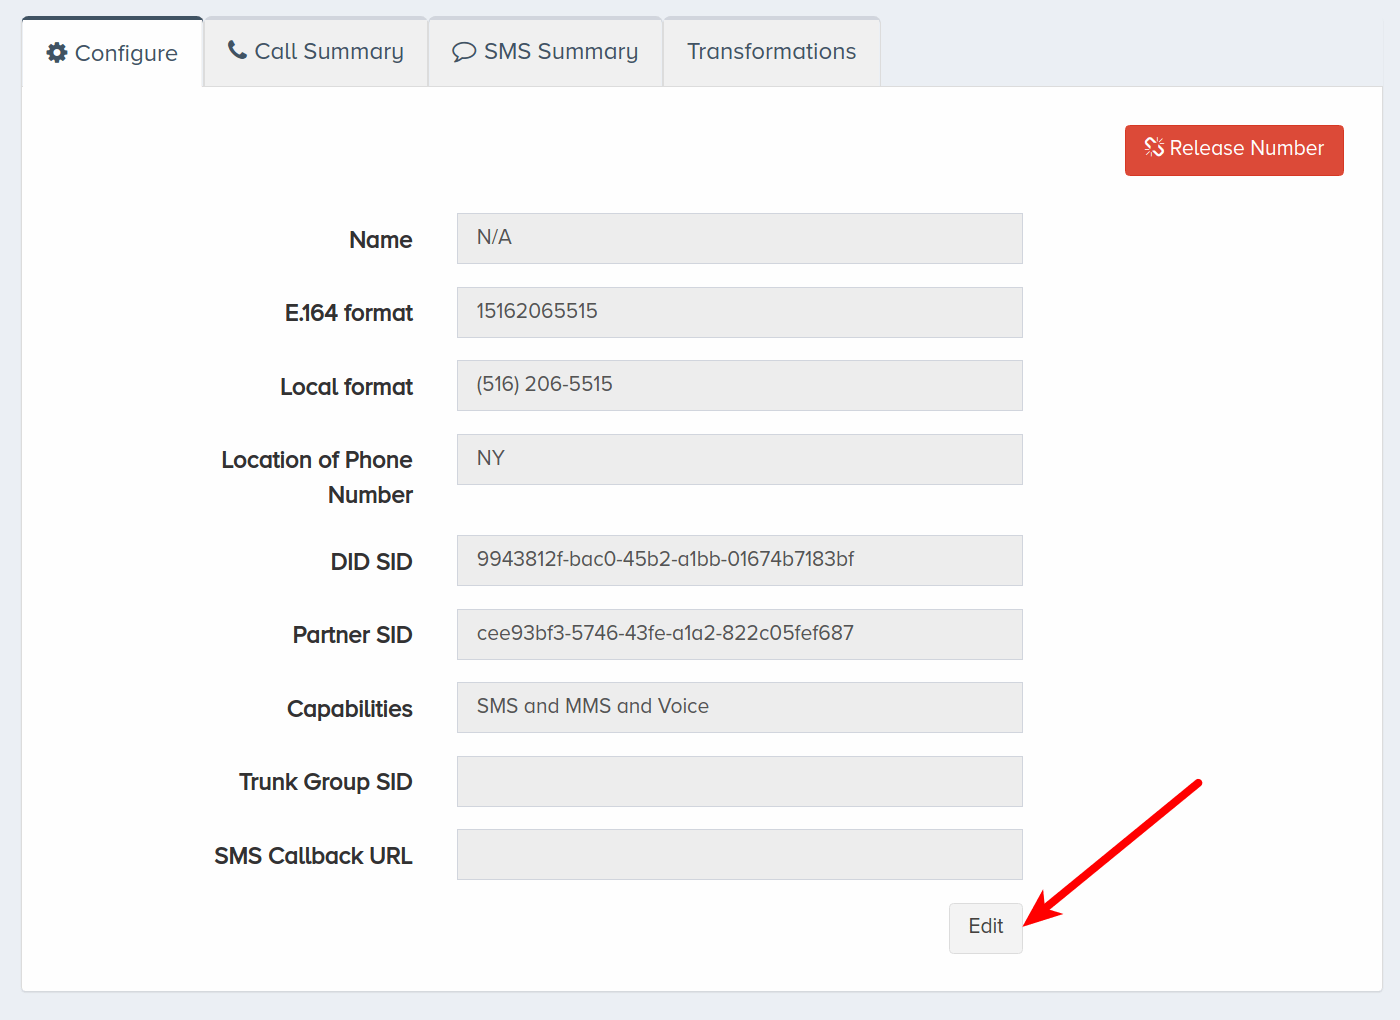
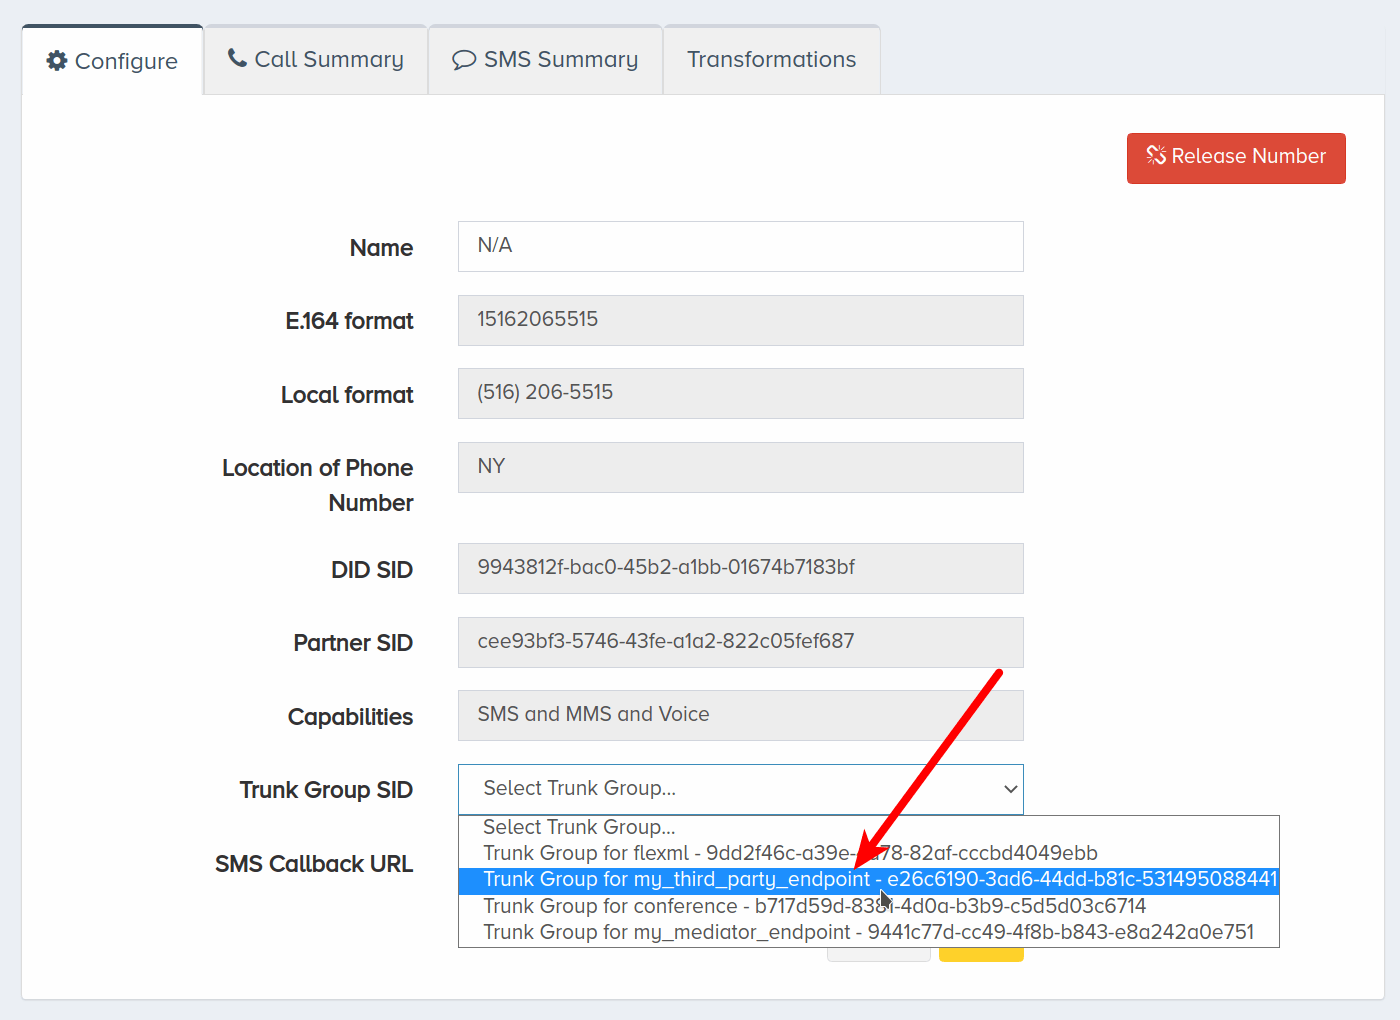
Select the trunk group you would like to assign to the phone number.
Click Save.
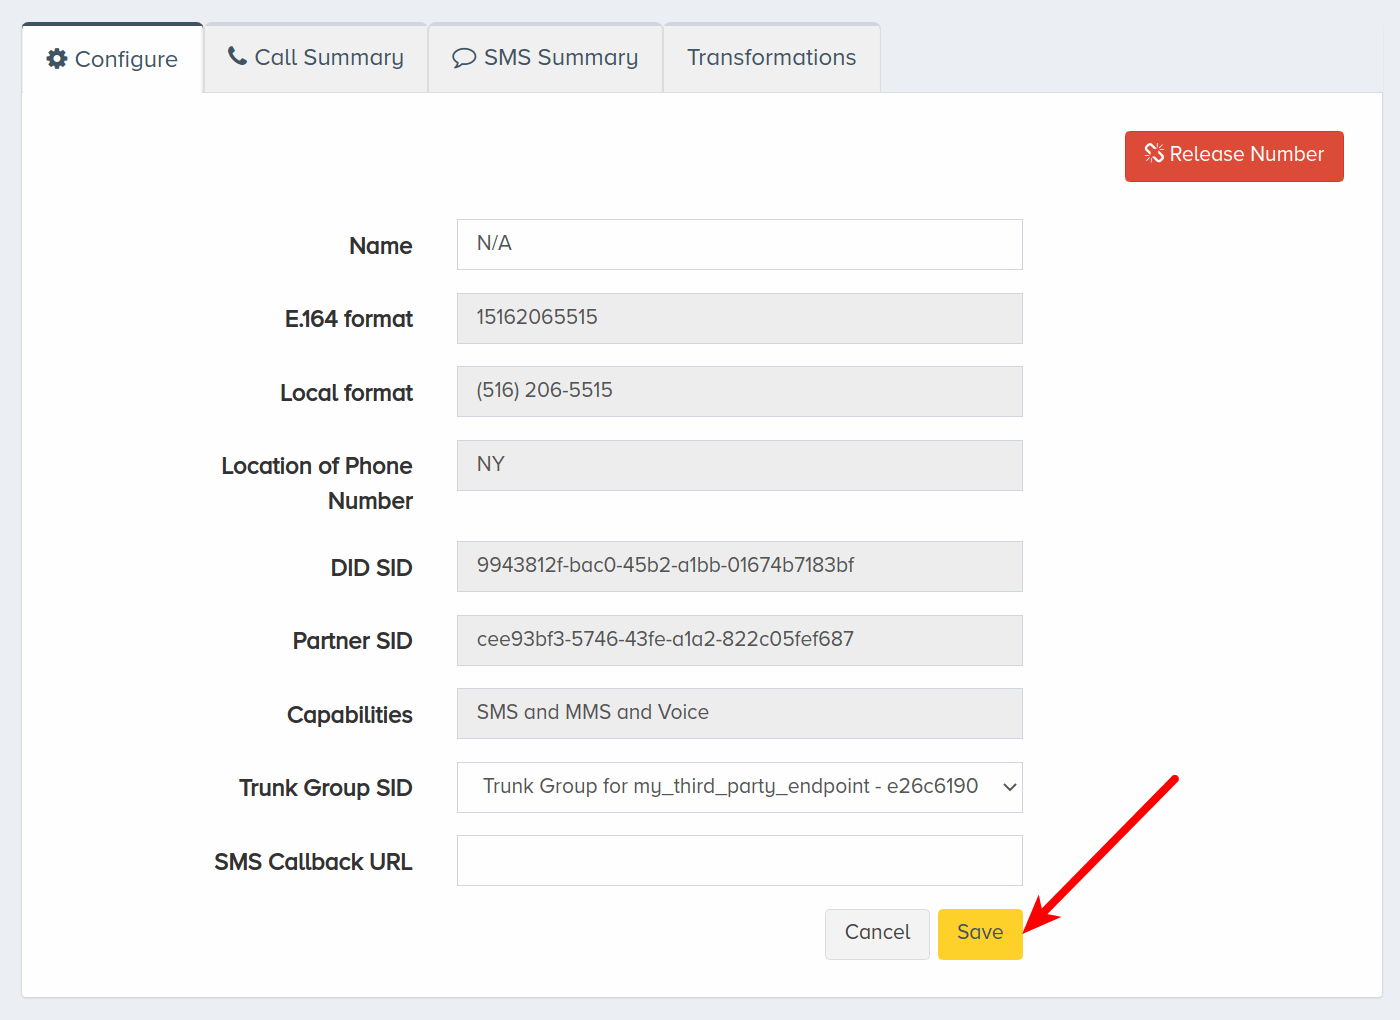
Now your SIP trunk is configured and a phone number is associated with it.
II. Create Using REST API
In this section, we will configure a SIP trunk programmatically using the CarrierX Core API.
Form a POST request with the type field and third_party value passed in the request body. You will also need to pass the ip field and value in the addresses array.
curl -X POST \
'https://api.carrierx.com/core/v2/endpoints' \
-H 'Content-Type:application/json' \
--data-binary '{"addresses": [{"ip": "124.93.122.43"}], "type": "third_party"}' \
-H 'Authorization: Bearer 5ebc03d6-8b2b-44ad-bf65-72d4f1491dda'
A successful request will return a 200 status code along with a response that looks like the following:
{
    "addresses": [
        {
            "direction": "any",
            "dst_port": 5060,
            "ip": "124.93.122.43",
            "location_sid": null,
            "port": 5060,
            "priority": 0,
            "sip_password": null,
            "sip_username": null,
            "srtp": false,
            "transport": "udp"
        }
    ],
    "attributes": {},
    "capacity": 0,
    "endpoint_sid": "6a898445-62c1-46cf-be8b-25c2a3c87ec7",
    "name": "N/A",
    "out_sip_password": null,
    "out_sip_username": null,
    "partner_sid": "77354609-bd20-4ed0-a523-8c00792f15b8",
    "properties": {},
    "transformations": [],
    "type": "third_party",
    "voip_token": "7630d609-b0ae-41cf-bcc2-b326b5836370"
}
Form another POST request. This request will create a trunk group and assign it to the endpoint we just created. To create a trunk alongside the trunk group, pass the with_trunks field in the query URL with the true value. In the request body, pass the field name with a name for your new trunk group. Also pass a trunks array with the name and endpoint_sid fields.
curl -X POST \
'https://api.carrierx.com/core/v2/trunk_groups?with_trunks=true' \
-H 'Content-Type: application/json' \
--data-binary '{"name":"New Trunk Group", "trunks":[{"name": "Trunk1", "endpoint_sid": "6a898445-62c1-46cf-be8b-25c2a3c87ec7"}]}' \
-H 'Authorization: Bearer 5ebc03d6-8b2b-44ad-bf65-72d4f1491dda'
A successful request will return a 200 status code along with a response that looks like the following:
{
    "acls": [],
    "hard_failure_codes": "408;",
    "hard_failure_cooldown": 120,
    "hard_failure_interval": 60,
    "hard_failure_threshold": 3,
    "name": "New Trunk Group",
    "partner_sid": "77354609-bd20-4ed0-a523-8c00792f15b8",
    "routing_data": null,
    "routing_type": "failover",
    "sip_options_locations": [],
    "sip_options_threshold": 3,
    "soft_failure_codes": "408;",
    "transformations": [],
    "trunk_group_sid": "31829e68-71ef-4e27-8f83-bb22ed67ae40",
    "trunks": [
        {
            "allow_forward": "disable",
            "call_type": "regular",
            "codec": null,
            "endpoint_sid": "6a898445-62c1-46cf-be8b-25c2a3c87ec7",
            "in_capacity": 0,
            "name": "Trunk1",
            "out_capacity": 0,
            "relay_sip_headers": [],
            "transformations": [],
            "trunk_sid": "af63f311-bad8-40bb-919d-eecb95affc1c"
        }
     ]
}
Now that we have programmatically created an endpoint and trunk group, we need to assign a phone number to the trunk group. Refer to the Phone Numbers section of the Core API Reference for information on renting and searching for DIDs.
Prior to renting a phone number, we need to find one that is available. For this, we will form a GET request and browse available DIDs.
curl -X GET \
'https://api.carrierx.com/core/v2/phonenumber/available_dids?limit=1' \
-H 'Authorization: Bearer 5ebc03d6-8b2b-44ad-bf65-72d4f1491dda'
A successful request will return a 200 status code along with a response that looks like the following:
{
    "count": 1,
    "has_more": true,
    "items": [
        {
            "attributes": {},
            "callback_url": null,
            "capabilities": 7,
            "country_code": "USA",
            "did_group_sid": null,
            "did_sid": "c9Ua99icuPRvDvsikvlNaPzMLDXwuEYJ",
            "in_country_format": "(518) 777-8620",
            "international_format": "+1 518-777-8620",
            "locality": null,
            "name": "N/A",
            "partner_sid": null,
            "phonenumber": "15187778620",
            "price": "0.6",
            "state": "NY",
            "transformations": [],
            "trunk_group_sid": null
        }
    ],
    "limit": 1,
    "offset": 0,
    "pagination": {
        "next": "https://api.carrierx.com/core/v2/phonenumber/available_dids?limit=1&offset=1"
    },
    "total": null
}
Take note of the phonenumber field, we will use the value in the next POST request.
Form a POST request. This request will assign a phone number that is available. The request will fail if the phone number is already rented. Pass the phonenumber and trunk_group_sid fields in the request body. The phonenumber value should be taken from the request above. The trunk_group_sid should correspond with the value of that field when we created the trunk group.
For a more comprehensive guide to renting a phone number, refer to the Rent a Phone Number quick start guide.
curl -X POST \
'https://api.carrierx.com/core/v2/phonenumber/dids' \
-H 'Content-Type: application/json' \
--data-binary '{"phonenumber":"15187778620", "trunk_group_sid":"31829e68-71ef-4e27-8f83-bb22ed67ae40"}' \
-H 'Authorization: Bearer 5ebc03d6-8b2b-44ad-bf65-72d4f1491dda'
A successful request will return a 200 status code along with a response that looks like the following:
{
    "attributes": {},
    "callback_url": null,
    "capabilities": 7,
    "country_code": "USA",
    "did_group_sid": null,
    "did_sid": "c9Ua99icuPRvDvsikvlNaPzMLDXwuEYJ",
    "in_country_format": "(518) 777-8620",
    "international_format": "+1 518-777-8620",
    "locality": null,
    "name": "N/A",
    "partner_sid": "77354609-bd20-4ed0-a523-8c00792f15b8",
    "phonenumber": "15187778620",
    "price": "0.6",
    "state": "NY",
    "transformations": [],
    "trunk_group_sid": "31829e68-71ef-4e27-8f83-bb22ed67ae40"
}
III. Receiving Calls
In this section, we will learn how to configure a SIP trunk to receive calls.
You will need to set up your firewall to accept the IP addresses listed in your System Gateway endpoint.
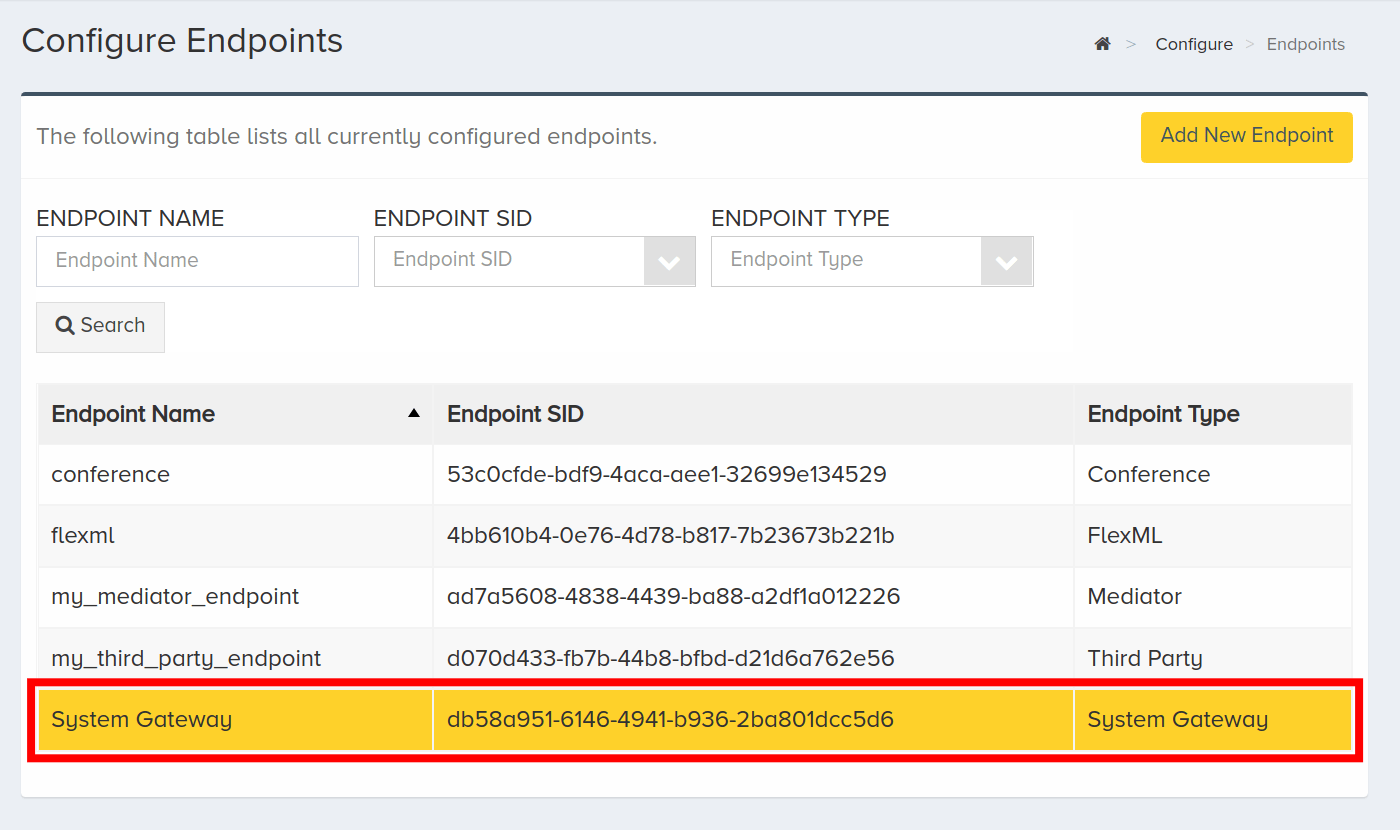
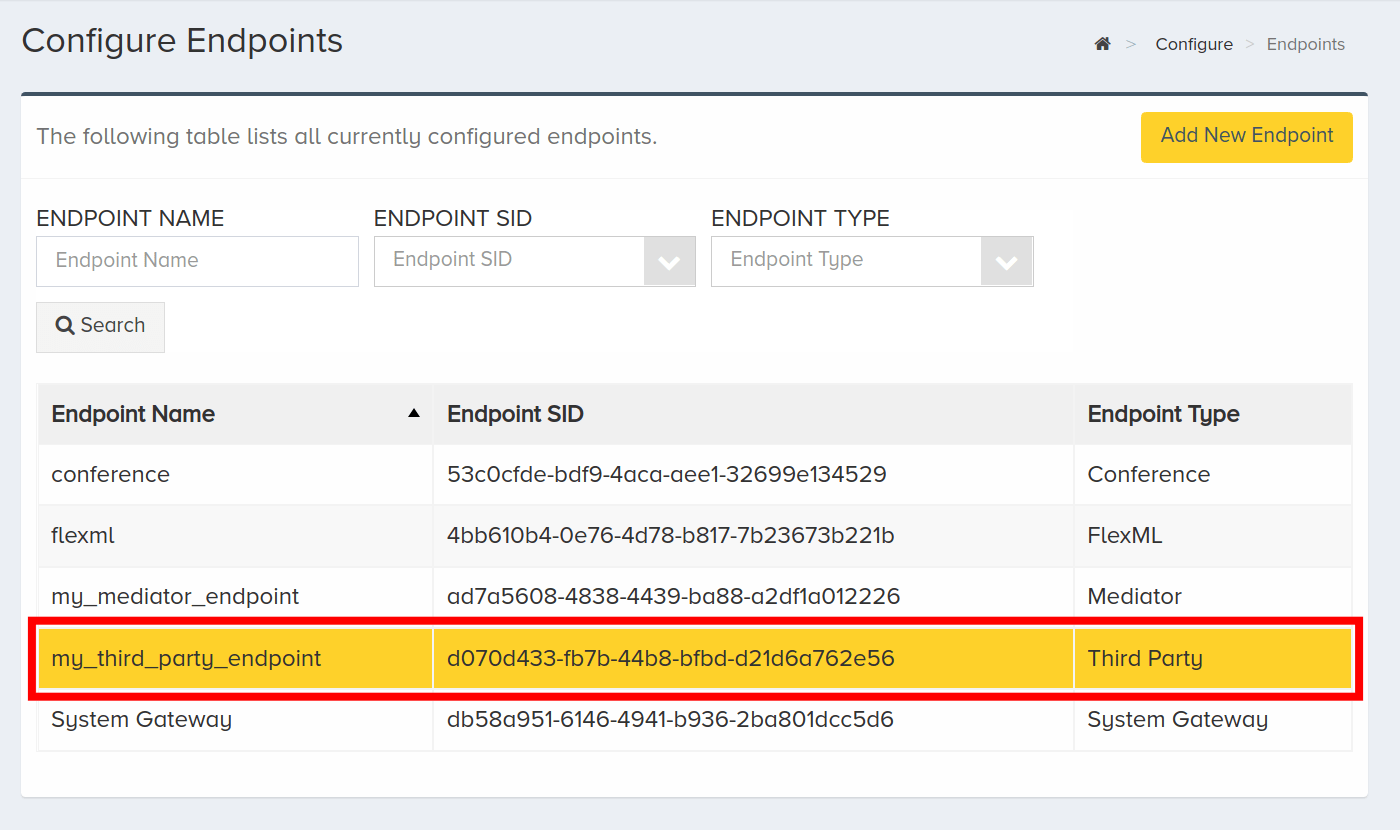
To do this, navigate to the Configure menu and click Endpoints.
Click the System Gateway endpoint.
Scroll down to see endpoint details. The IP addresses are listed in the Endpoint address attributes section.
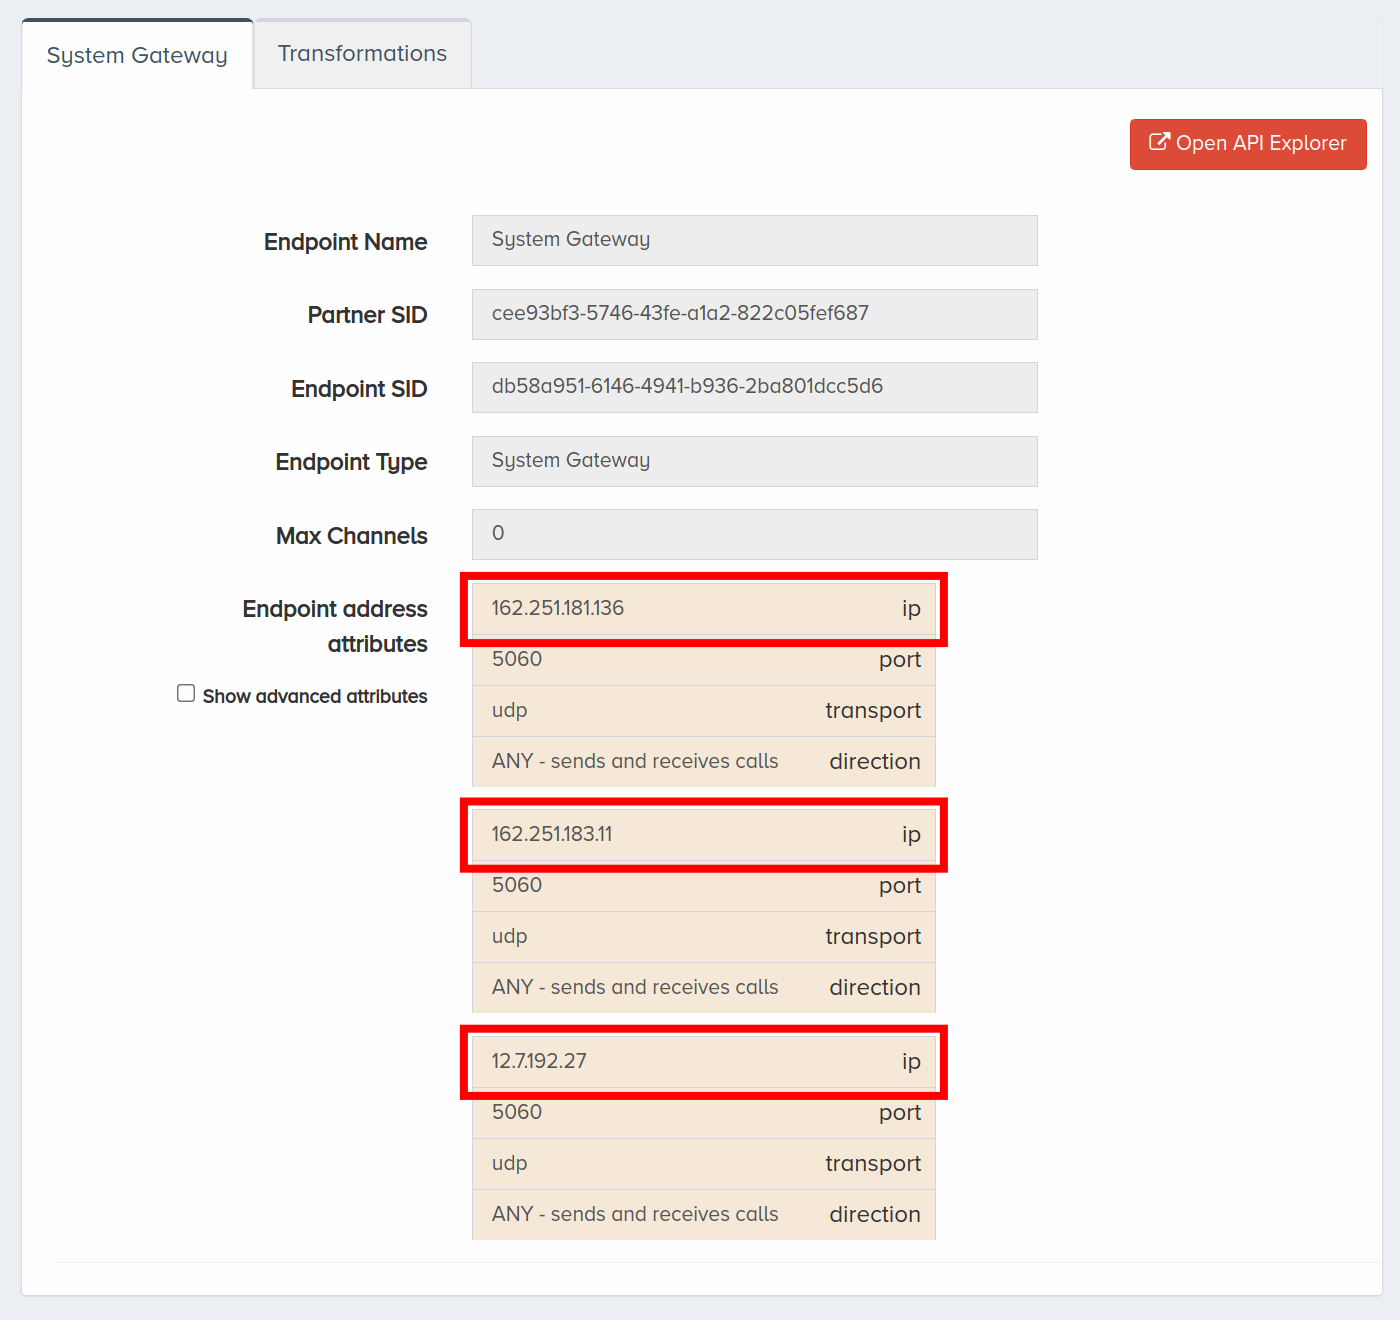
Configure your firewall to accept traffic from these IP addresses. Now your endpoint is ready to receive calls.
IV. Placing Calls
In this section, we will learn how to configure a SIP trunk to place calls.
You will need to set up your firewall to accept the IP addresses listed in your System Gateway endpoint.
To do this, navigate to the Configure menu and click Endpoints.
Click the endpoint titled System Gateway.
Scroll down to see endpoint details. The IP addresses are listed in the Endpoint address attributes section.
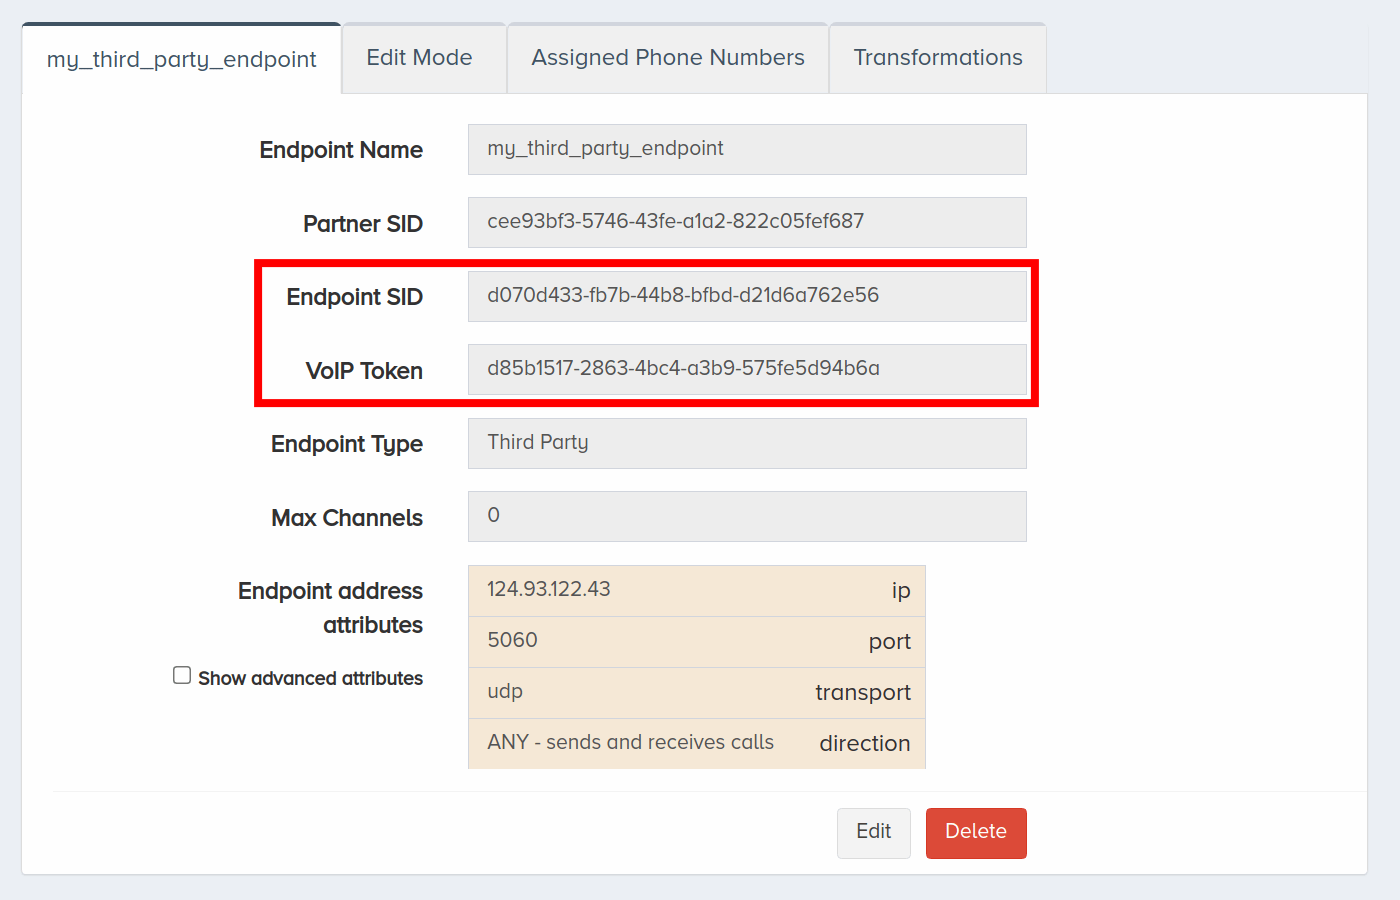
Configure your firewall to accept traffic from these IP addresses. Next, click the third party endpoint we configured earlier.
Scroll down to see endpoint details. We use proxy authentication to place calls. For this, you will use the Endpoint SID as the username, and the VoIP Token as the password.
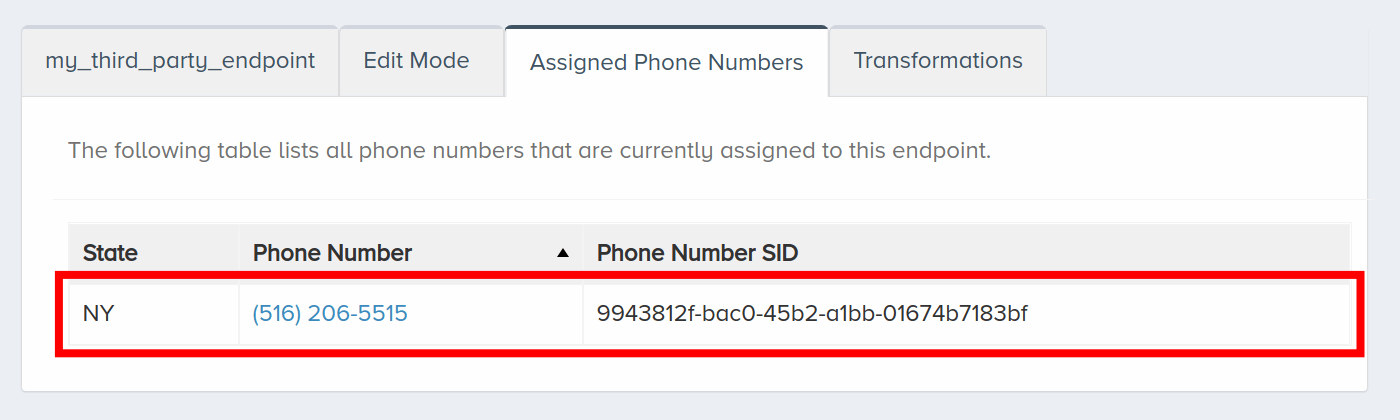
Click the Assigned Phone Numbers tab to view which phone numbers are associated with the endpoint. These are the phone numbers that calls can be made from.
V. Next Steps
You configured a SIP trunk! Now you can test incoming and outgoing calls on your new endpoint. If you need to review some of the steps, see our Configure a SIP Trunk video.
Refer to our Core API Reference for more in-depth documentation about Endpoints and Trunk Groups.