Getting Started With Postman
In this guide, you will learn how to use Postman, a stand-alone client that enables you to test out our APIs. We will go over how to import API collections, where to input your authentication, and how to run queries.
I. Importing Collections
In this section, we will get Postman running and import API collections. First, you will need to download the Postman client to your computer. To do so, visit the Postman website and click Download.
After you have downloaded the Postman client, go to the documentation for the API that you want to run (we have included links below). In the Introduction at the top of the documentation, you will find the Run in Postman button. Simply click that button and the collection will automatically import to your Postman client.
Here, you see all four collections for each of the APIs because we have imported them all. If you have imported one collection, you will only see the collection that you imported.
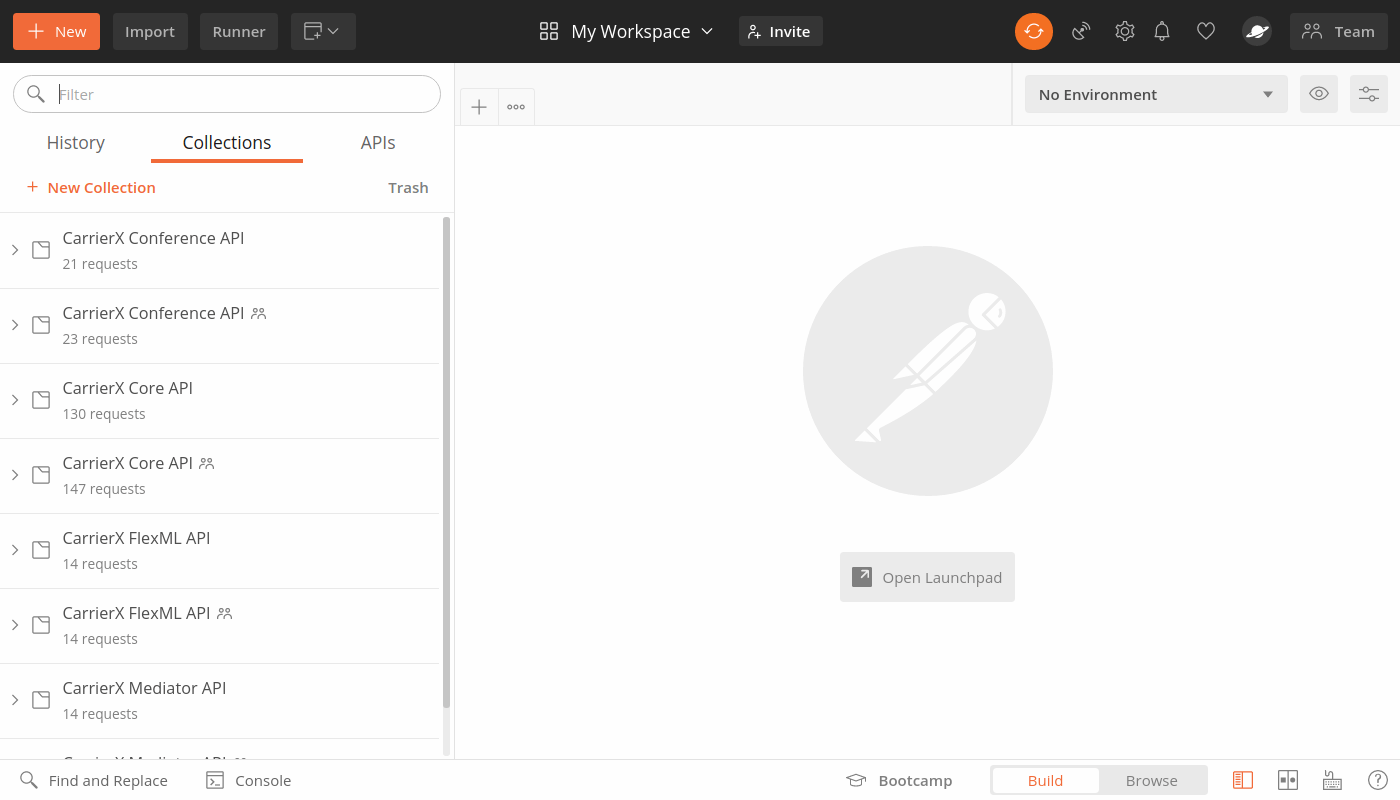
In the following sections, we will learn how to authenticate your collections and send requests.
II. Authentication
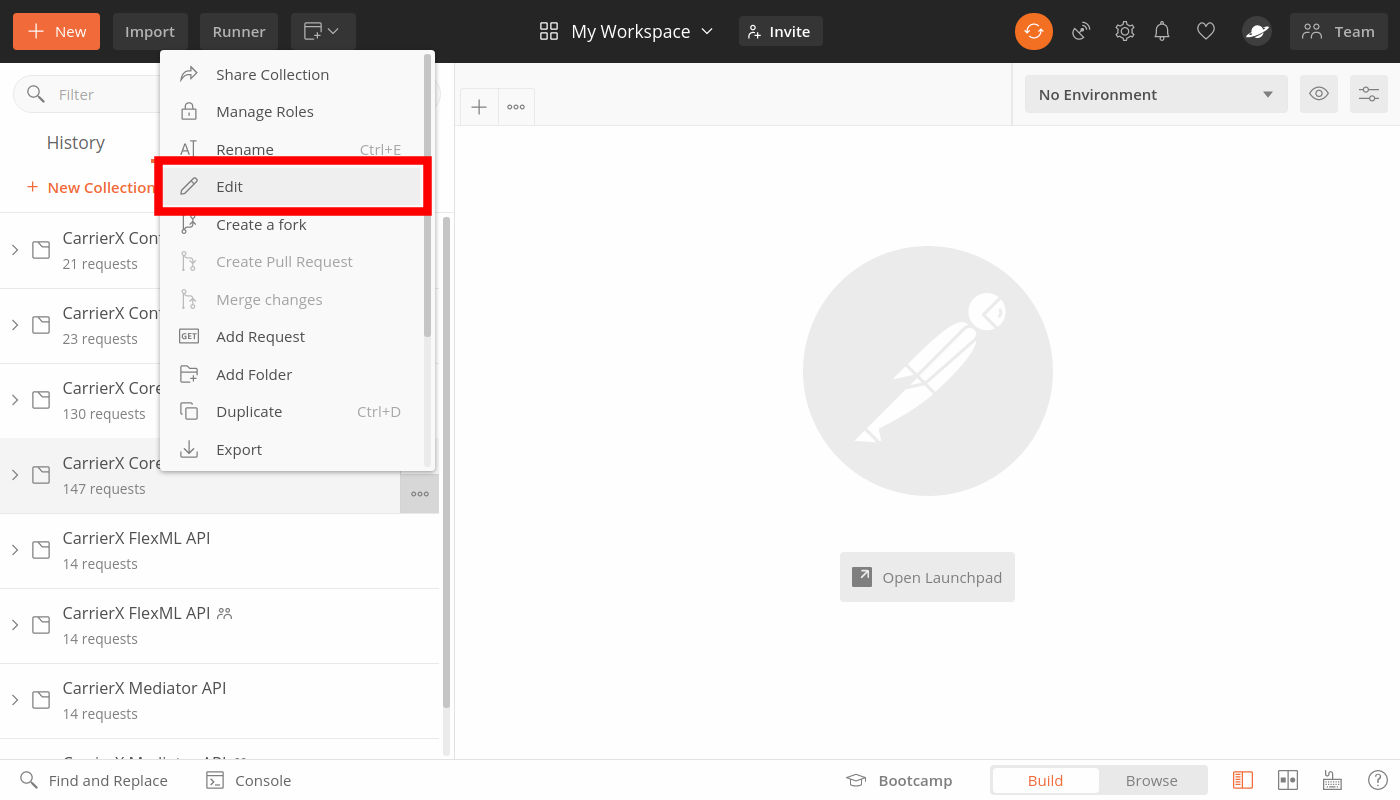
In this section, we will go over adding your own authentication so that you can make requests. Hover over the collection that you would like to add authentication to and click the three dot icon. This will expand a small menu, as seen in the image below. Click Edit.
An EDIT COLLECTION window will pop up. Click the Authorization tab.
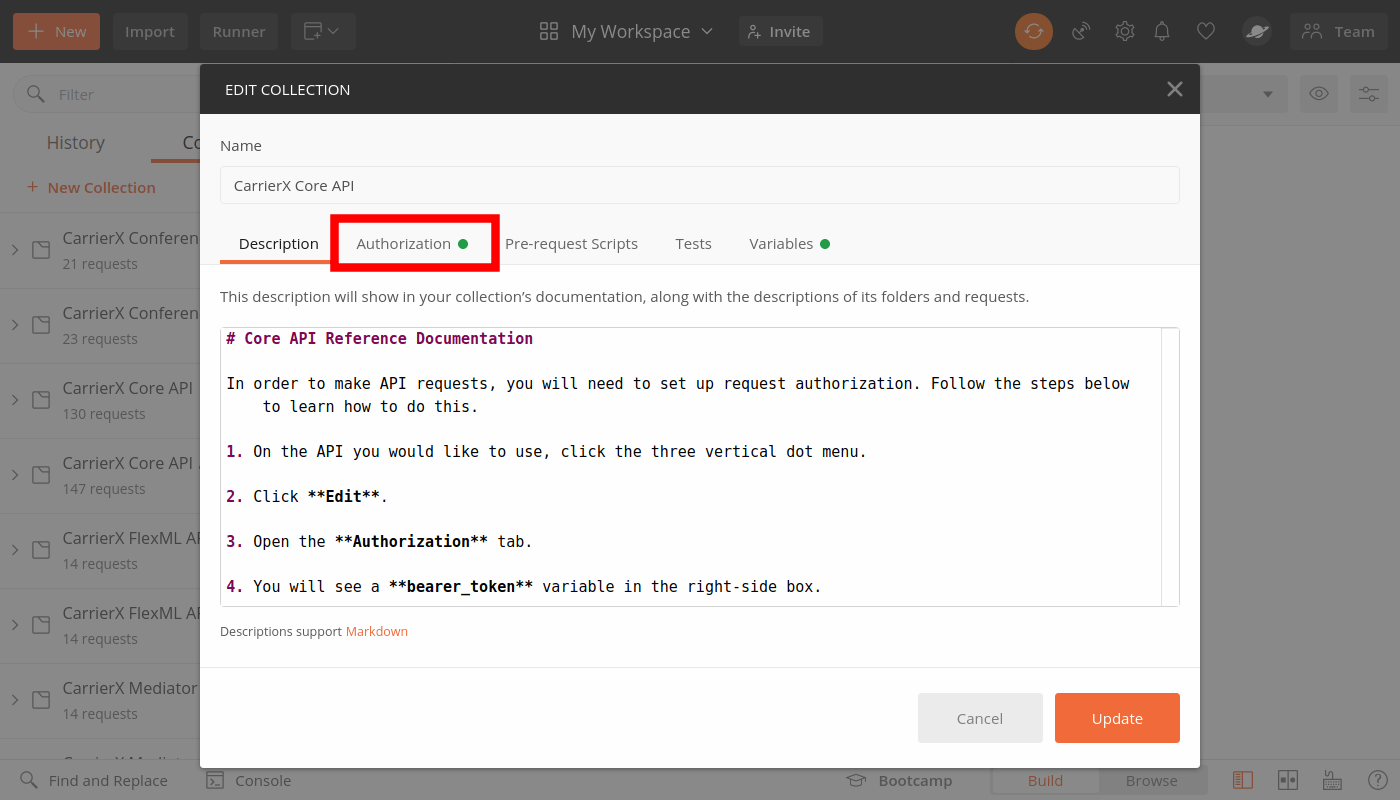
For the Core API, we will be using a Token. We will go over authentication for Conference, FlexML, and Mediator endpoints later in this tutorial.
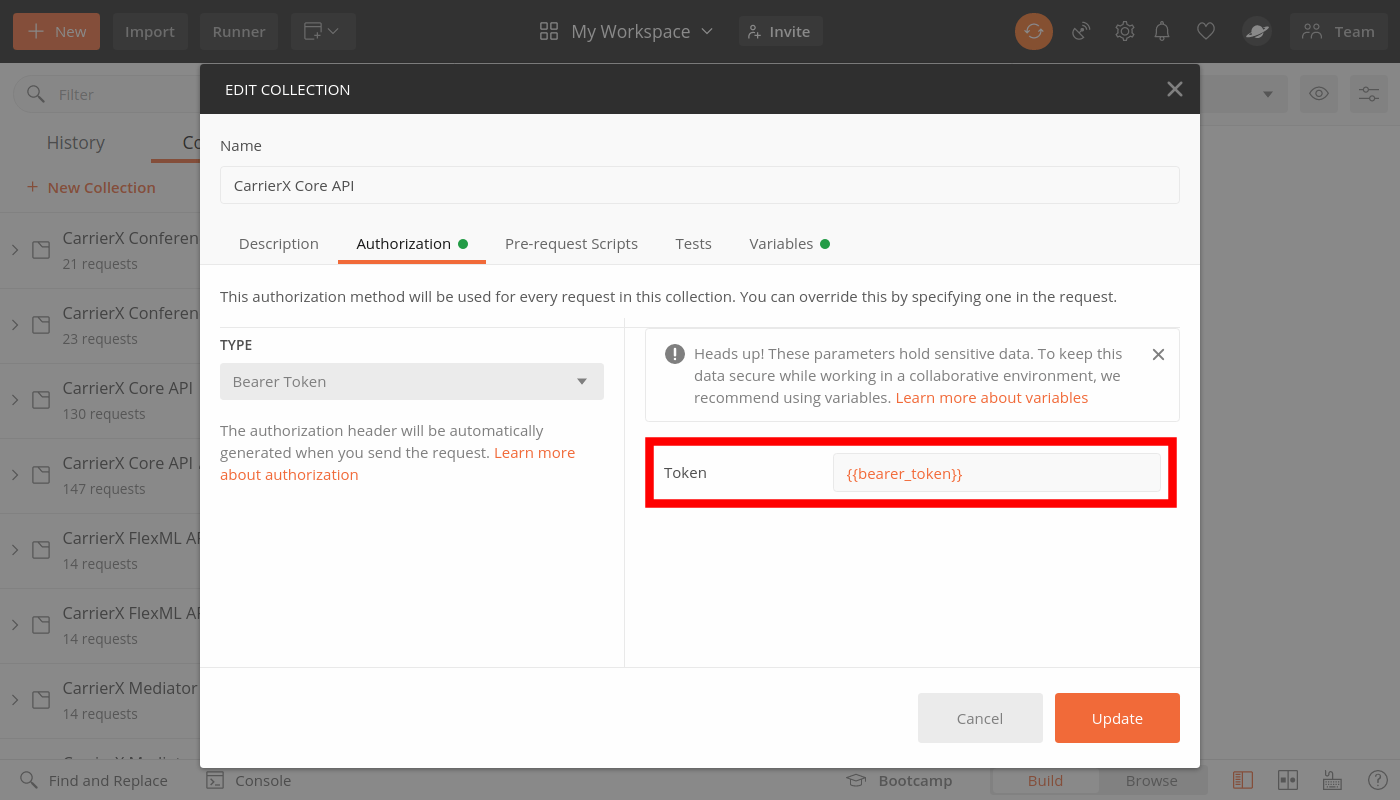
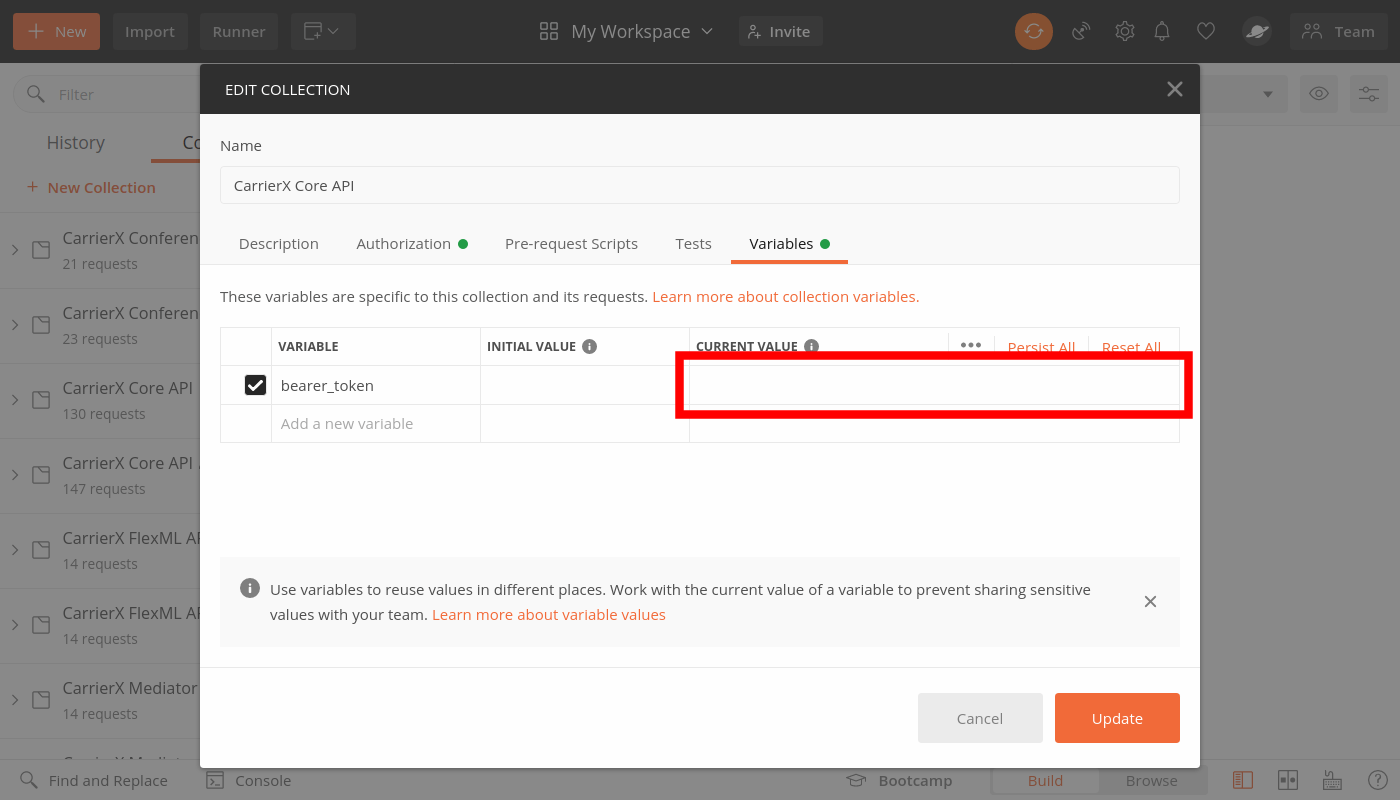
You will see in the right-side box that there is a bearer_token variable. You can replace this variable with your token directly. Alternatively, learn how to assign this variable in the next step (recommended if you are sharing this collection or working on a team).
To learn how to create a security/bearer token for Core API authentication, refer to the Security Token quick start guide.
To assign the bearer_token variable, click the Variables tab and enter a value for bearer_token in the CURRENT VALUE box. Then click Update.
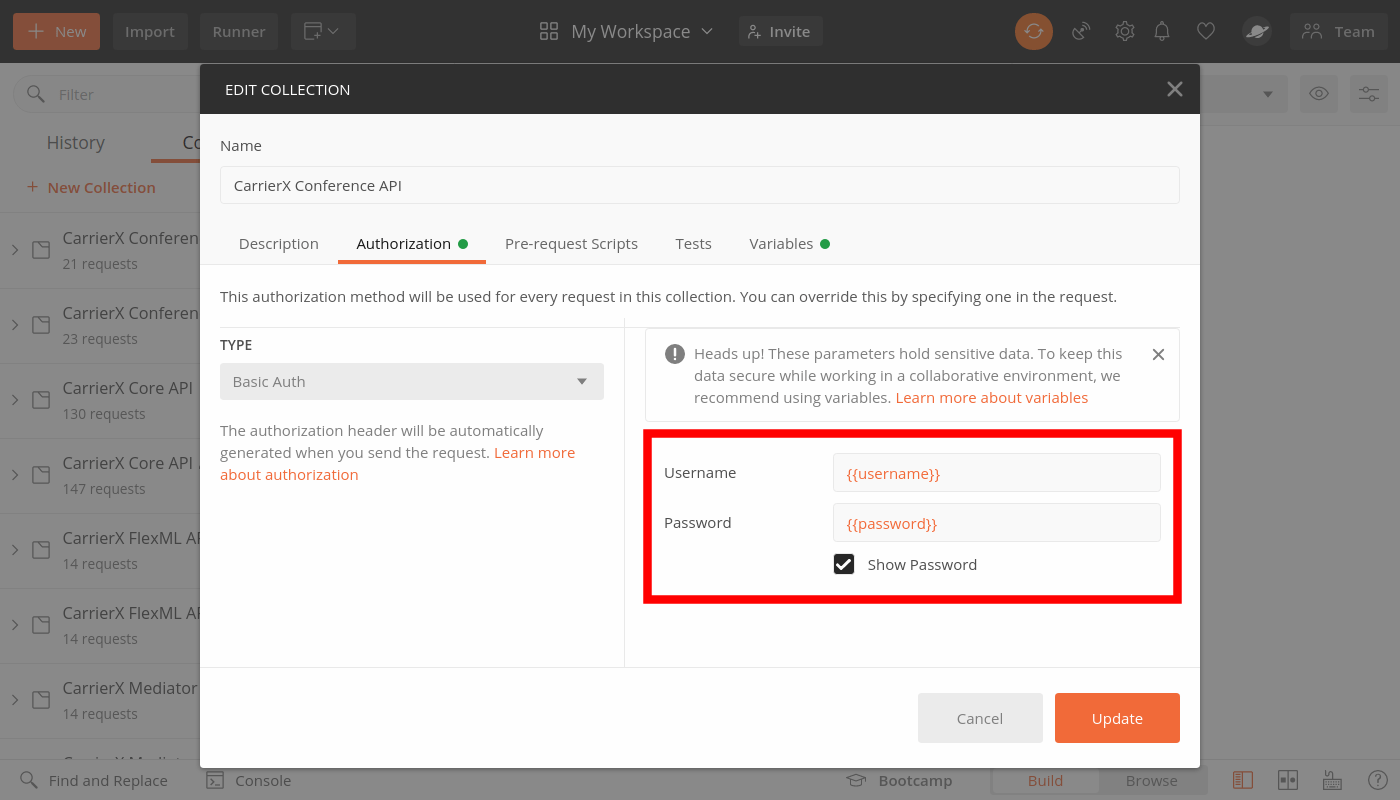
For the Conference, FlexML, and Mediator APIs, we will be using Basic Auth. On the Authorization tab, you will see variables for username and password in the right-side boxes. You can replace these variables here for your login values. Alternatively, learn how to assign these variables in the next step (recommended if you are sharing this collection or working on a team).
There are two ways of getting your credentials for those endpoints: through the Portal or via API requests.
- Through the Portal:
- Go to Configure > Endpoints,
- Click an endpoint,
- The endpoint information including the API Login and API Password will be shown in the fields below.
- Via an API request: you can obtain Conference, FlexML, and Mediator API credentials from the Core API by sending a request to Get Endpoints. The response will be a list of endpoints. The credentials are listed as the
loginandpasswordfields.
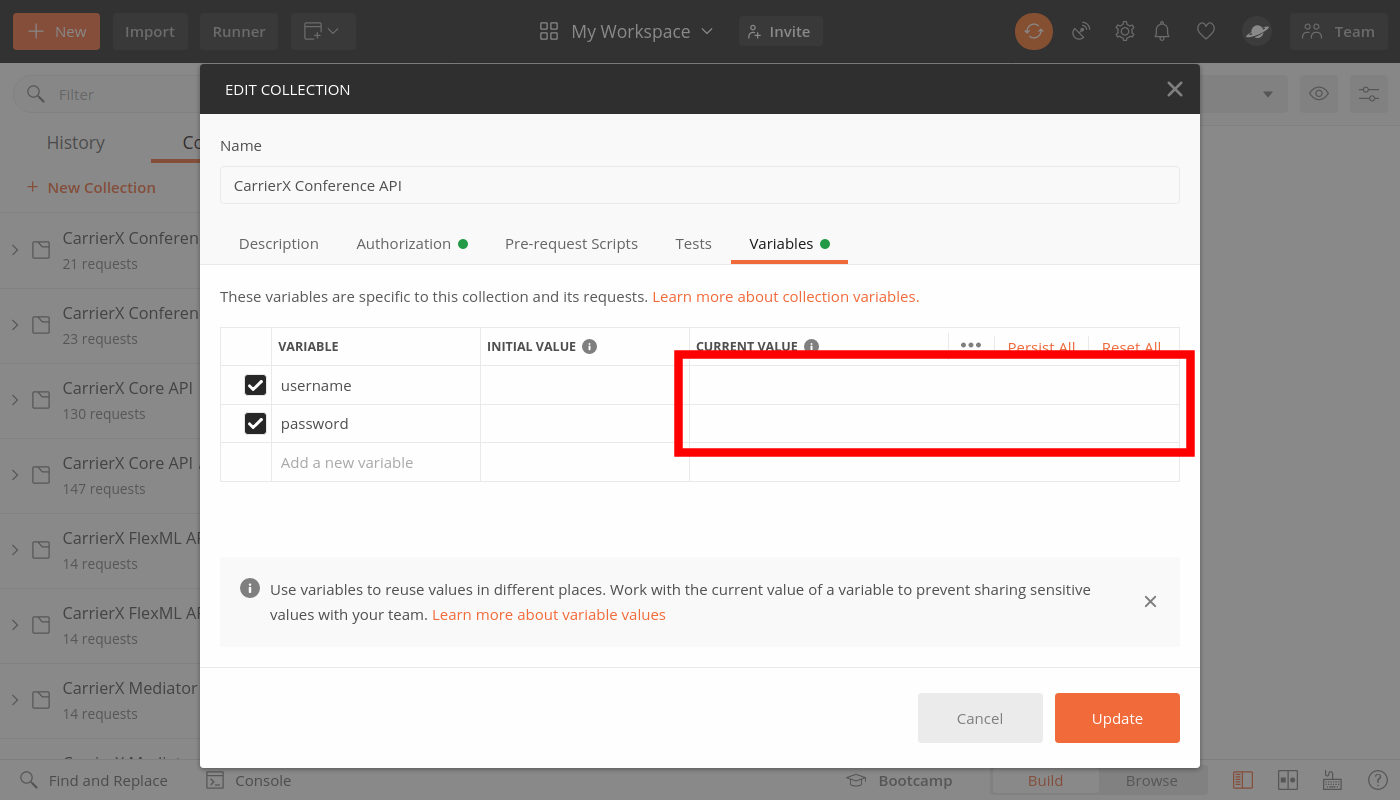
To assign the username and password variables, click the Variable tab and enter a value for each in the CURRENT VALUE boxes. Then click Update.
Now that you’ve entered your credentials for the Core API and hosted endpoint APIs (Conference, FlexML, and Mediator), let’s learn how to send a request.
III. Sending Request
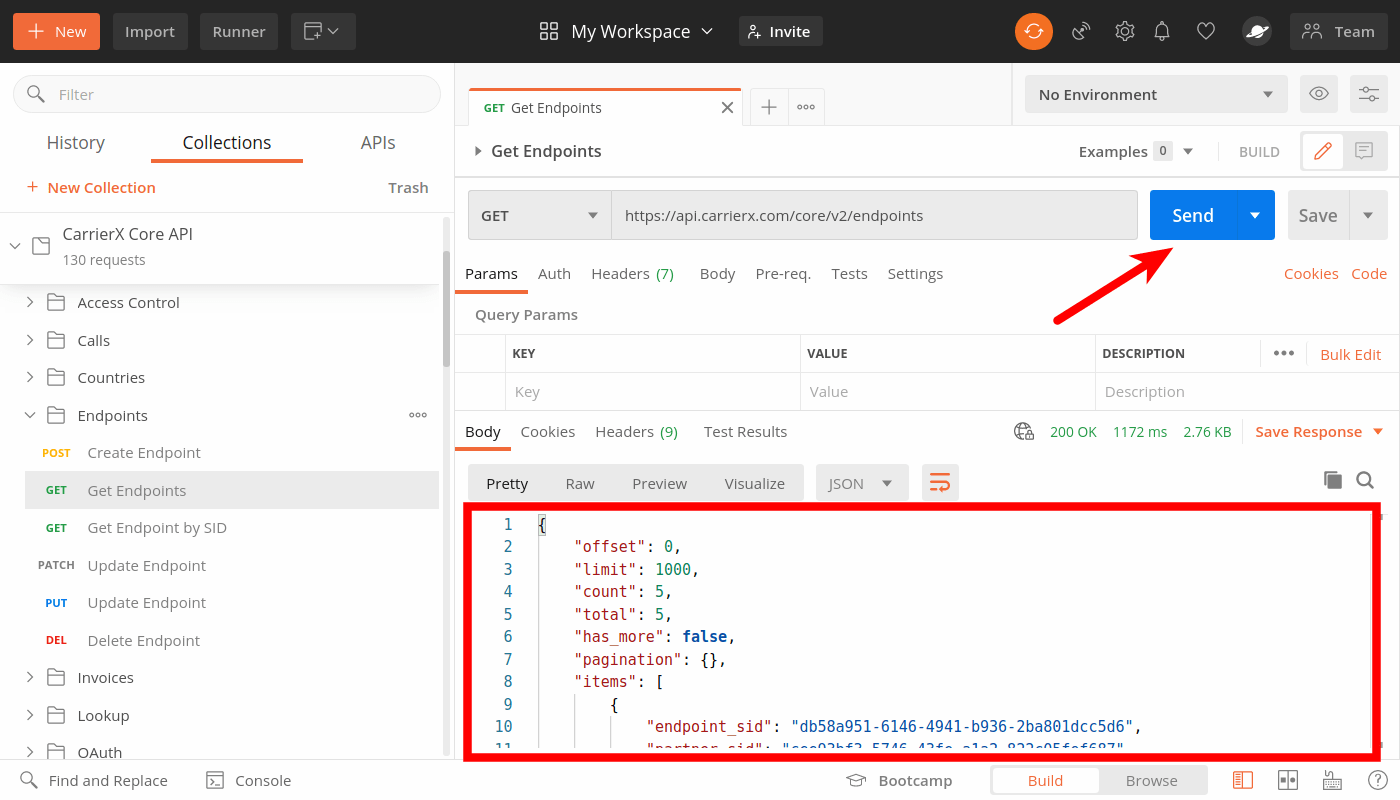
In this section, we will learn how to send a request. You should already have set up your authentication as shown in the previous step, otherwise the request will not work. In the following example, we have selected the Get Endpoints request from the left-side menu. Choose any request you want to run.
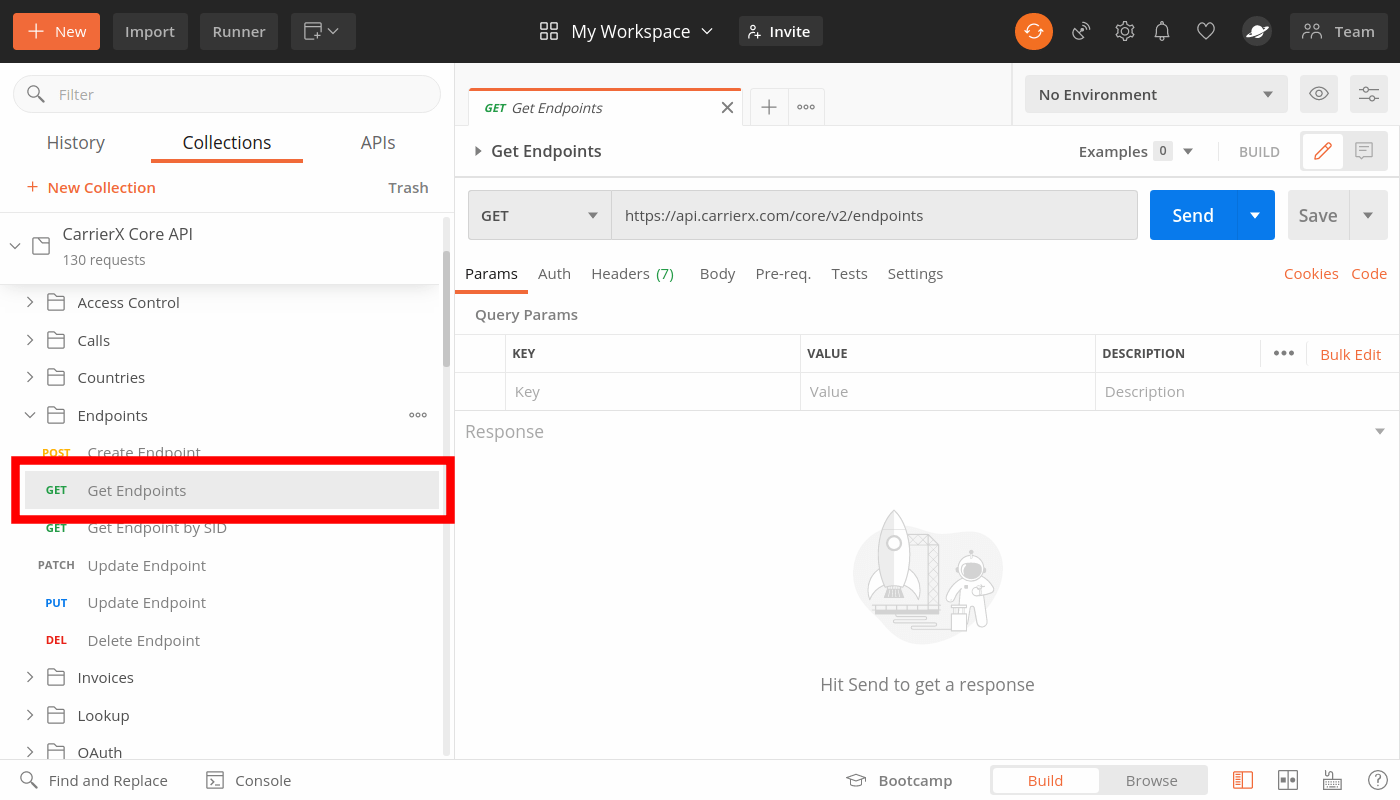
There are no variables that we need to add to this request, so we can click Send. Your response will appear in the box below. If you get an authentication error, run through the Authentication section again and ensure that you entered the right credentials.
For other requests, you may need to add some query param, path variables, or body values. Check the Params, Authorization, Headers, and Body tabs to see if there are any additional requirements for your request.
Now you know how to make a request in Postman! In the following section, we’ll go over a PATCH request.
IV. Request Example
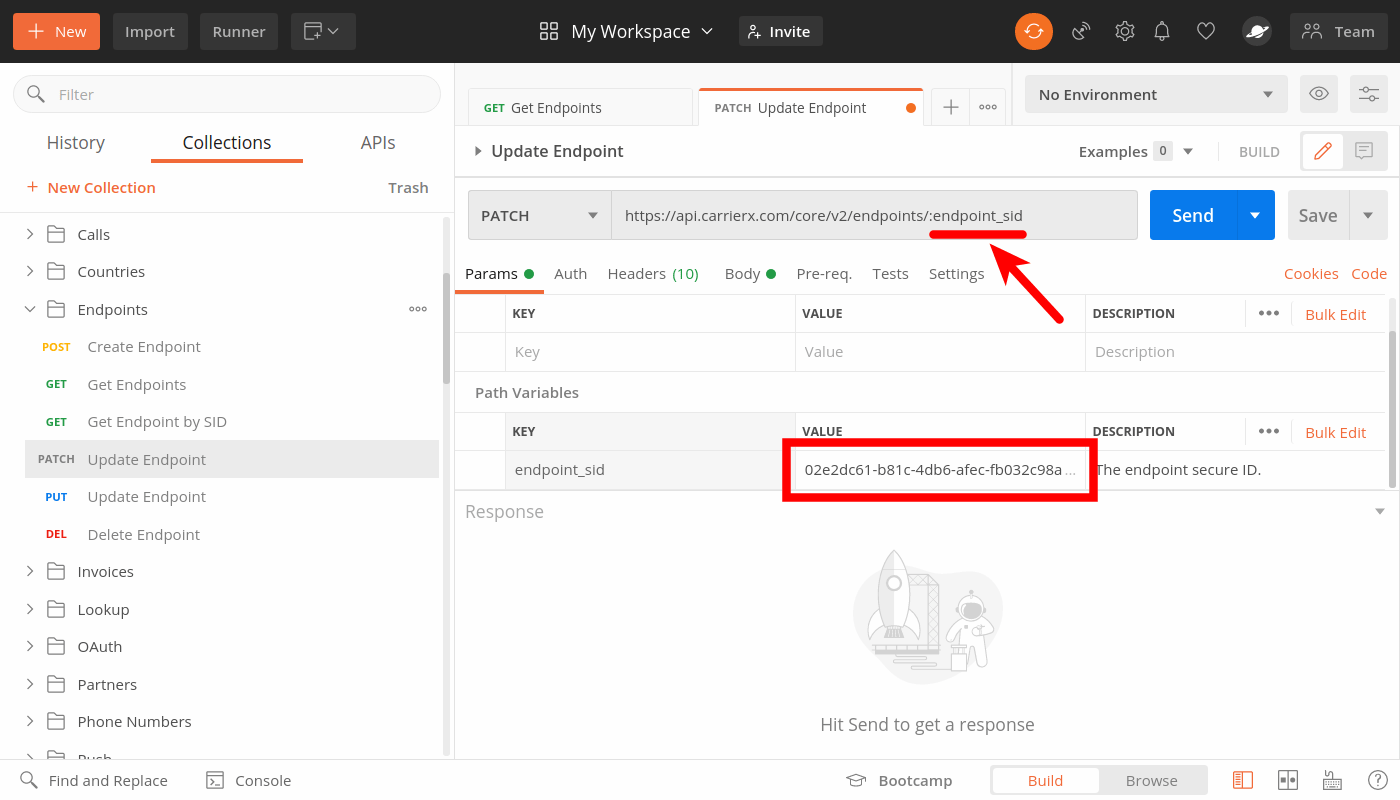
In this section, we will go through an in-depth example of sending a PATCH request to Update Endpoint using the Core API. In the Params tab, you will see a path variable named endpoint_sid listed under Path Variables. Enter the endpoint_sid value in the VALUE box, as highlighted below.
An endpoint_sid is a unique identifier for a specific endpoint. You can get an endpoint_sid value by making a request to Get Endpoints using the Core API. Look in the response for the endpoint_sid value of the endpoint that you would want to update in this PATCH request.
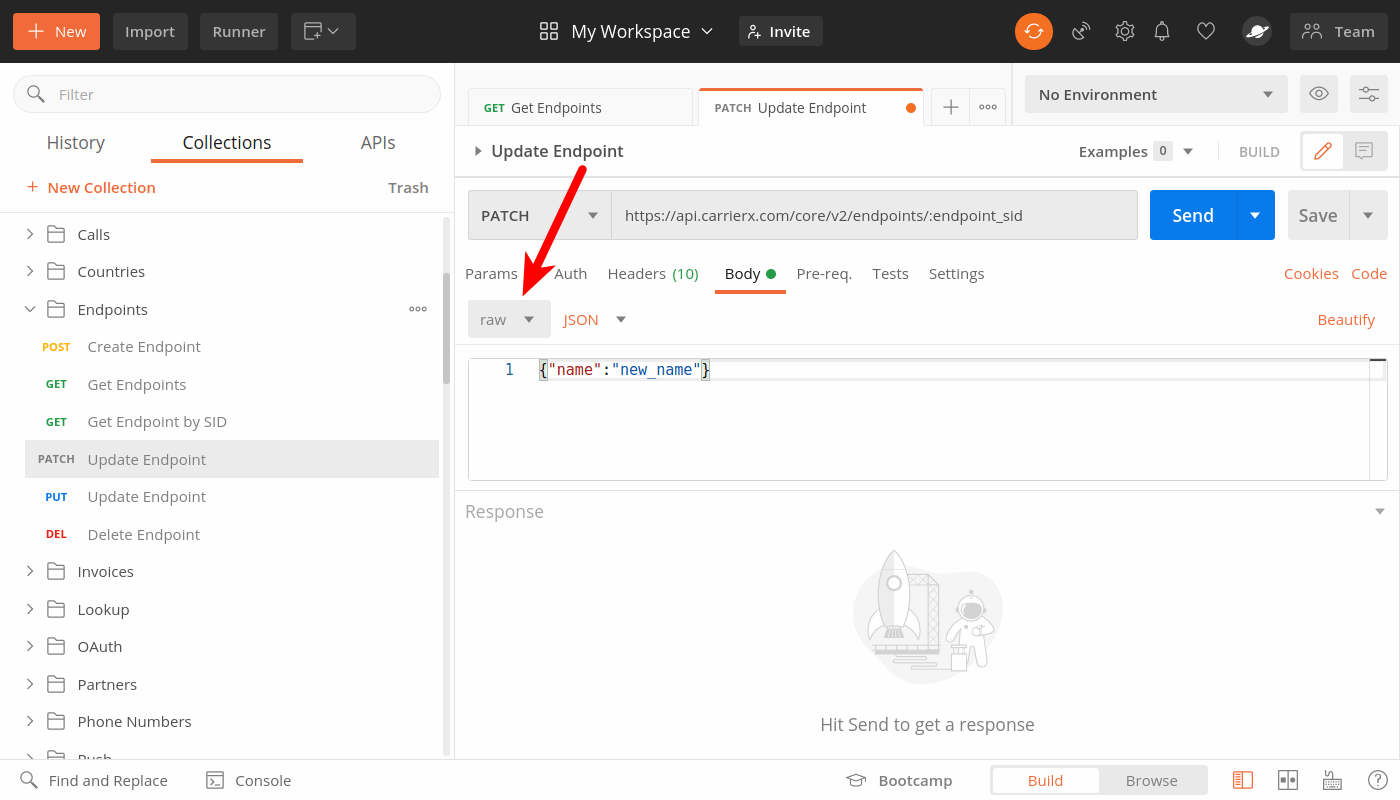
For this PATCH request, we also want to add some body data in the Body tab. Select raw from the data type options if it’s not already selected. Then in the space below, add an object with the values that you want to update. We added {"name": "new_name"}. Refer to the Core API Reference to see which fields can be updated through a PATCH request to Update Endpoint.
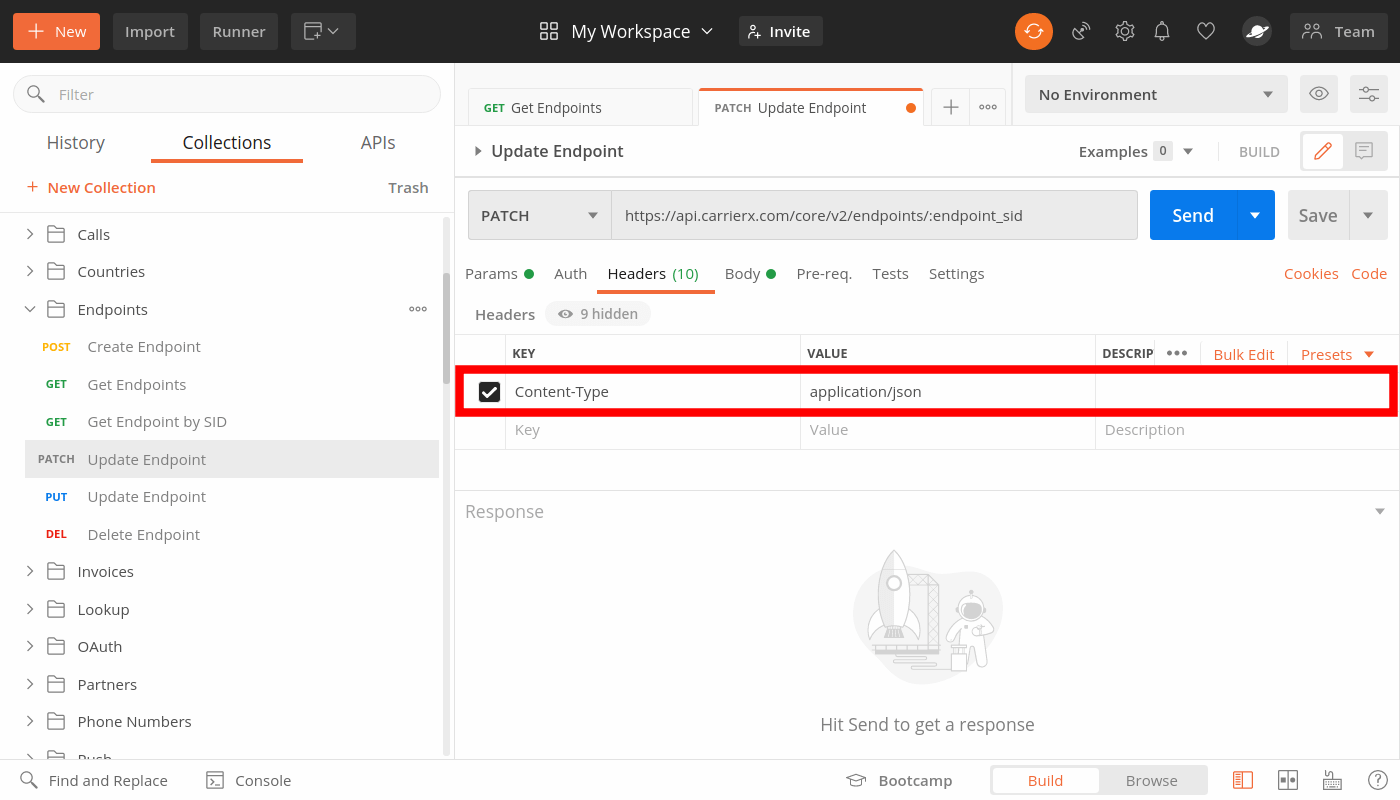
Now we have entered all of the data we need to pass to complete this request, but we need to ensure that we have the proper header. Click the Headers tab and check that there is a field named Content-Type with the application/json value.
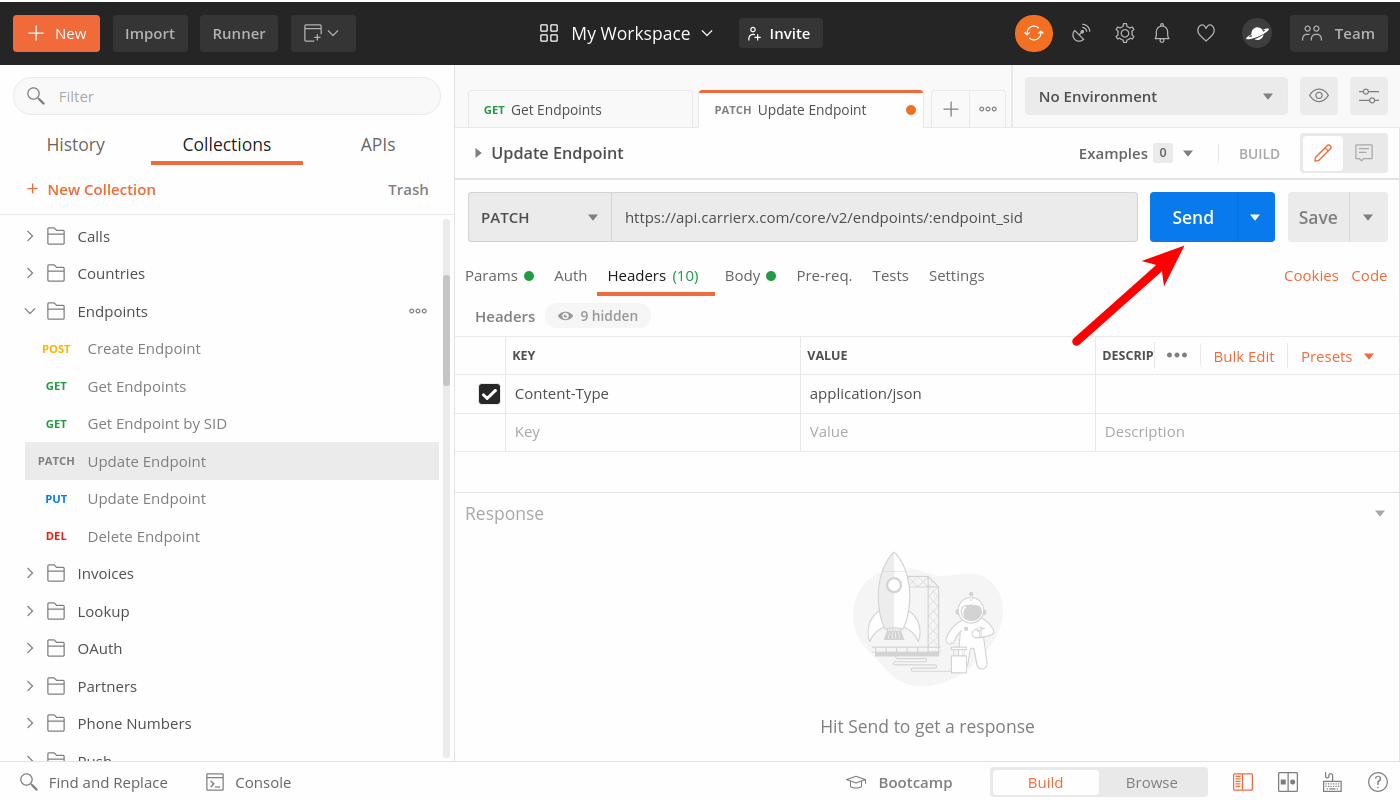
Once you have finished adding your path variables, body data, and checked the headers, click Send.
Now you’ve learned how to modify an object by sending a PATCH request!
V. Next Steps
You’ve learned the basics of Postman! Refer to the Core, Conference, FlexML, and Mediator API documentation for more in-depth information about each request.